- Русский – Инструкция по эксплуатации Vitek VT-3508
- Страница 5
- Инструкция и руководство для Vitek VT-3508 на русском на английском
- ВИДЕО И БЫТОВАЯ ТЕХНИКА Инструкция по эксплуатации GB RUS UA.
- Инструкция по эксплуатации
- English
- Vitek 120 projection time инструкция
- Витек часы с проектором как установить время?
- Как настроить время на часах First Austria?
- Как настроить часы на микроволновой печи Vitek?
- Как настроить часы радио?
- Как установить время на часах Philips?
- Как настроить электронные часы Сони?
- Как настроить часы на микроволновой печи?
- Как установить время на микроволновой печи Whirlpool?
- Как установить время на микроволновке Starwind?
- Как правильно настроить электронные часы?
- Как настроить время в часах?
- Как настроить время и дату на часах?
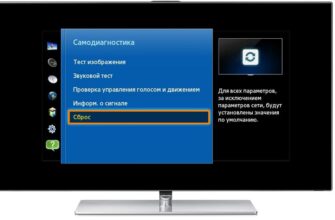
- Как выставить время на экране телевизора?
- Как установить время на будильнике?
- Инструкция и руководство для
- ВИДЕО И БЫТОВАЯ ТЕХНИКА Инструкция по эксплуатации GB RUS UA.
- Инструкция по эксплуатации
- English
- Инструкция к часам будильнику с проектором Метеостанция
- VITEK
- Компания производит такую бытовую технику как:
- Как настроить часы vitek 120 projection vt 3508
- Инструкция и руководство для
- English
- English
- English
- English
- Инструкция и руководство для
- ВИДЕО И БЫТОВАЯ ТЕХНИКА Инструкция по эксплуатации GB RUS UA.
- Инструкция по эксплуатации
- English
- Русский — Инструкция по эксплуатации Vitek VT-3508
- Страница 5
- English — Инструкция по эксплуатации Vitek VT-3508
- Страница 3
Русский – Инструкция по эксплуатации Vitek VT-3508
Страница 5

РАДИО ЧАСЫ БУДИЛЬНИК С ПРОЕКТОРОМ
1. ПЕРЕКЛЮЧАТЕЛЬ (POWER) АВТО/ВКЛ/ВЫКЛ
2. СВЕТОДИОДНЫЙ ИНДИКАТОР
3. ИНДИКАТОР РЕЖИМА АВТО (AUTO)
4. ВКЛЮЧЕНИЕ РЕЖИМА КОРОТКОГО
СНА/ОТКЛЮЧЕНИЕ ТАЙМЕРА (SNOOZE)
5. УСТАНОВКА/ОТКЛЮЧЕНИЕ БУДИЛЬНИКА
6. УСТАНОВКА ВРЕМЕНИ (SET/OFF TAME)
7. УСТАНОВКА ТАЙМЕРА ОТКЛЮЧЕНИЯ (SLEEP)
8. ПЕРЕКЛЮЧАТЕЛЬ (DIMMER) ЯРКОСТЬ
ДИСПЛЕЯ НИЗКАЯ/ВЫСОКАЯ (LOW/HIGH)
9. УСТАНОВКА ЧАСОВ (HOUR)
10.УСТАНОВКА МИНУТ (MIN)
11.РЕГУЛЯТОР ГРОМКОСТИ РАДИО (VOLUME)
12.ПЕРЕКЛЮЧАТЕЛЬ ЧАСТОТНОГО ДИАПАЗОНА
13.НАСТРОЙКА РАДИО (TUNING)
14.ОТСЕК БАТАРЕИ РЕЗЕРВНОГО ПИТАНИЯ
17.УКАЗАТЕЛЬ ШКАЛЫ НАСТРОЙКИ РАДИО
18.ВКЛ/ВЫКЛ ПРОЕКТОРА (PROJETION ON/OFF)
20.КНОПКА УСТАНОВКИ ВРЕМЕНИ
ПРОЕКЦИОННЫХ ЧАСОВ (TAME)
21.КНОПКА УСТАНОВКИ ЧАСА ПРОЕКЦИОННЫХ
22.КНОПКА УСТАНОВКИ МИНУТ
ПРОЕКЦИОННЫХ ЧАСОВ (MIN)
23.РЕГУЛИРОВКА ФОКУСА (FOCUS)
24.ПЕРЕКЛЮЧАТЕЛЬ БУДИЛЬНИКА РАДИО /
ЗУММЕР (ALARM RADIO/BUZZ)
ПИТАНИЕ ОТ СЕТИ ПЕРЕМЕННОГО ТОКА
Перед включением убедитесь, что
напряжение электрической сети,
соответствует рабочему напряжению
Вынимайте сетевую вилку из розетки, если
не пользуетесь устройством длительное
Не разбирайте устройство самостоятельно,
внутри нет деталей, которые обслуживаются
Для предотвращения пожара и опасности
поражения током не допускайте попадания
воды в корпус устройства.
Запрещается нарушать условия
естественной вентиляции устройства, не
ставьте устройство в закрытые книжные
шкафы или на полки, где нет достаточной
Запрещается ставить на устройство
источники открытого пламени, такие как
При обнаружении неисправности
обращайтесь в авторизованный сервисный
Откройте крышку батарейного отсека (14) и
установите батарейку типа 6F-22
напряжением 9В. Батарейка используется
для сохранения информации о текущем
времени и времени установки будильника,
при пропадании сетевого напряжения.
Установите переключатель AUTO/ON/OFF (1)
в положение OFF и вставьте сетевую вилку в
розетку, при этом показания на дисплее
Для установки текущего времени нажмите и
удерживайте кнопку SET/OFF TIME (6),
кнопками MIN (10) è HOUR (9) установите
ТЕКУЩЕЕ ВРЕМЯ НА ЧАСАХ И
ПРОЕКЦИОННЫХ ЧАСАХ УСТАНАВЛИВАЕТСЯ
УСТАНОВКА ВРЕМЕНИ ПРОЕЦИОННЫХ
Для проецирования показаний часов на
стену, выдвиньте проектор по направлению
от себя и поверните его в горизонтальной
Включите проектор кнопкой PROJETION
ON/OFF (18), регулятором FOCUS (23)
добейтесь четкого изображения на стене.
Для установки текущего времени
проекционных часов, нажмите и удерживайте
кнопку TIME (20), кнопками MIN (22) è HOUR
(21) установите текущее время.
ЗАМЕЧАНИЕ: ВОЗМОЖНОЕ РАССТОЯНИЕ
ПРОЕЦИРОВАНИЯ ПОКАЗАНИЙ ЧАСОВ В
ЗАТЕМНЕННОЙ КОМНАТЕ ОТ 0,9 до 2, 7 м.
УСТАНОВКА ВРЕМЕНИ ВКЛЮЧЕНИЯ
Нажмите и удерживайте кнопку ALARM
SET/OFF (5), кнопками HOUR (9) è MIN (10)
установите необходимое время включения
УСТАНОВКА БУДИЛЬНИКА НА
ПРОБУЖДЕНИЕ ПОД РАДИО
Установите время включения будильника как
Источник
Инструкция и руководство для
Vitek VT-3508 на русском на английском
16 страниц подробных инструкций и пользовательских руководств по эксплуатации
Блендер Vitek VT-3413 (VT-3407) — Обзор
Увлажнитель воздуха VITEK VT-1764
Машинка для стрижки волос ⊙ VITEK VT-1362 G (Ремонт)
соко-вижималка VITEK VT-3655BN
Ремонт часов Vitek VT-3504
Часы Vitek VT 6605
Ремонт радиоприемника «VITEK VT 3582ВК»
Обзор пылесоса Vitek VT-8130 BK
ВИДЕО И БЫТОВАЯ ТЕХНИКА Инструкция по эксплуатации GB RUS UA.
Инструкция по эксплуатации
Инструкция по эксплуатации
Инструкция по эксплуатации
Інструкція з експлуатації
Radio clock with projector
Радиочасы с проектором

Инструкция по эксплуатации
3508.qxd 11.03.05 16:44 Page 2

English
CLOCK RADIO WITH ALARM AND PROJECTOR
1. POWER SELECTOR (AUTO/ON/OFF)
2. LED INDICATOR
3. AUTO MODE INDICATOR
4. SNOOZE BUTTON
6. TIME SET BUTTON
8. LOW/HIGH DIMMER SWITCH
12.BAND SELECTOR (AM/FM)
14.BACKUP BATTERY COMPARTMENT
17.RADIO FREQUENCY SCALE
18.PROJECTION ON/OFF BUTTON
20.PROJECTOR TIME SET BUTTON
24.ALARM RADIO/BUZZ SELECTOR
AC POWER SUPPLY
Before connecting, make sure that the electrical
supply voltage is compatible with the devices
Remove the AC plug from the outlet if the device
will not be used for a long period of time.
Do not attempt to repair this device yourself;
there are no user-serviceable parts inside.
Do not allow water to splash or spill onto the
device in order to avoid fire and electric shock.
Do not obstruct the natural ventilation of the
device; do not place it in closed bookshelves or
on shelves were there is not good ventilation.
Do not place sources of open flames, like can-
dles, on the device.
In case of malfunction, contact an authorized
Open the battery compartment (14) and install
one 6F-22 type 9V battery (not included). The
battery is used to save information regarding the
current time and alarm settings in case of AC
Set the AUTO/OFF/ON (1) selector to the Off
position and plug the power plug into the outlet;
the display will start to blink.
To set the current time, press and hold the TIME
(6) button, then use the HOUR (10) and MIN (9)
buttons to set the current time.
THE CURRENT TIME ON THE CLOCK AND THE
PROJECTED TIME ARE SET SEPARATELY.
SETTING THE PROJECTED TIME
To project the current time onto the wall, point
the projector away from itself and into a horizon-
Turn on the projector using the PROJECTION
ON/OFF (18) button; use the FOCUS (23) dial to
achieve a sharp image on the wall.
To set the current time on the projector, press
and hold the TIME (20) button, then use the MIN
(22) and HOUR (21) buttons to set the current
NOTE: THE PROJECTION DISTANCE OF THE
TIME IN A DARK ROOM IS FROM 0.9 TO 2. 7 m.
SETTING THE ALARM TIME
Press and hold the ALARM (5) button; use the
HOUR (9) and MIN (10) buttons to set the
desired alarm time.
WAKING UP TO THE RADIO
Set the alarm time as instructed above.
Set the AUTO/OFF/ON (1) selector to the On
Tune the radio to the desired station and adjust
Set the ALARM RADIO/BUZZ (24) selector to
Set the AUTO/ON/OFF (1) selector to AUTO.
The alarm will activate at the pre-set time and
will automatically turn off after 1 hour and 59
WAKING UP TO BUZZER ALARM
Set the alarm time as indicated above.
Rotate the VOLUME/BUZZ (24) dial counter-
clockwise until it clicks in order to activate the
BUZZ alarm mode.
Set the Auto/Off/On (1) selector to Auto. The
buzzer alarm will activate at the set alarm time.
TURNING OFF THE ALARM
Press the ALARM SET/OFF (5) button to turn off
the alarm; the set alarm time remains saved for
use the next day.
Set the AUTO/ON/OFF (1) selector to the OFF
position to turn off the alarm permanently.
You can temporarily silence the alarm (buzzer or
radio) by pressing the Snooze (4) button; the
alarm will automatically activate again in 9 min-
Источник
Vitek 120 projection time инструкция
Витек часы с проектором как установить время?
Как настроить время на часах First Austria?
- Перейдите в режим ВРЕМЕНИ, нажмите и удерживайте кнопку CLK/ MEM в течение 2 секунд, на экране начнет мигать время.
- Нажмите на кнопку TUN+/HOUR для установки часов.
- Нажмите на кнопку TUN-/MIN для установки минут.
- После того как время установлено,
Как настроить часы на микроволновой печи Vitek?
Откройте дверцу печи, поместите продукты в рабочую камеру и закройте дверцу. пиктограмма (20). Нажмите цифровую кнопку «8», для установки уровня мощности 80% «Р 8». Нажмите кнопку «Время» (4) и цифровыми кнопками (2) установите время приготовления «10 : 00».
Как настроить часы радио?
Как настроить дату и время на часах с радиоприемником ( Radio)
- Нажмите и удерживайте кнопку ВВОД/НАСТРОЙКА ВРЕМЕНИ (ENTER/ SET) не менее двух секунд. …
- Для выбора года последовательно нажимайте кнопку + или -, затем нажмите кнопку ВВОД/НАСТРОЙКА ВРЕМЕНИ (ENTER/ SET).
Как установить время на часах Philips?
Как установить ЧАСЫ и БУДИЛЬНИК?
- Поверните регулятор часов в положение SET (установить время) или SET ALARM (установить будильник) для установки времени или будильника.
- Последовательно нажимайте HR (часы) или MIN (минуты) или нажмите и удерживайте эти кнопки для установки часов и минут. …
- Настроив время, отпустите кнопку HR (часы) или MIN (минуты).
Как настроить электронные часы Сони?
Как установить время на часах?
- Нажмите кнопку МЕНЮ.
- С помощью горизонтальной кнопки управления выберите вкладку [1] в меню настройки, затем выберите пункт [/ setup] (Настройка даты/времени) с помощью вертикальной кнопки управления. …
- Установите дату и время с помощью кнопки управления.
Как настроить часы на микроволновой печи?
Как установить время на микроволновке
- Нажмите клавишу «Стоп/Сброс»;
- Для установки ручного режима выберите кнопку «Старт»;
- Теперь отрегулируйте значения клавишами «Больше/Меньше». При этом показания будут изменяться на 10 секунд в большую или меньшую сторону.
Как установить время на микроволновой печи Whirlpool?
- Нажимайте кнопку часов (3 секунды) до тех пор, пока не замигает левая (часовая) цифра.
- Нажмите кнопки +/- для настройки значения часов.
- Еще раз нажмите кнопку часов. (Мигают две правые цифры (минутные).
- Нажмите кнопки +/- для настройки значения минут.
- Еще раз нажмите кнопку часов ()
Как установить время на микроволновке Starwind?
Чтобы установить время, нужно:
- В режиме ожидания нажмите и удерживайте кнопку ВРЕМЯ/ТАЙМЕР более 3 секунд, чтобы выбрать 12-часовые часы, снова нажмите кнопку, чтобы выбрать 24-часовой формат, снова нажмите кнопку.
- Используйте цифровую клавиатуру для ввода правильного времени.
Как правильно настроить электронные часы?
Как настроить время на электронных часах?
- Нажать кнопку MOD, держать несколько секунд до момента, когда экран начнет мигать. …
- Кнопка SET поможет указать желаемые параметры системы, выставить правильное время. …
- После окончания настройки и выставления правильного времени завершите процесс нажатием кнопки MOD.
Как настроить время в часах?
Установите часовой пояс на часах вручную
- Если экран часов затемнен, коснитесь его.
- Проведите по экрану сверху вниз.
- Выберите «Настройки» . Если этого пункта нет, проведите по экрану влево.
- Нажмите Системные Дата и время.
- Прокрутите вниз и выберите Часовой пояс. …
- Выберите нужный часовой пояс.
Как настроить время и дату на часах?
Чтобы установить время на умных часах вручную, поставьте оба параметра для сети в неактивное состояние и задайте дату, время или часовой пояс.
Чтобы изменить формат времени в часах:
- Зайдите в меню Настройки — Системные — Дата и время.
- Отыщите в списке строку 24-часовой формат.
- Установите переключатель в положение «Вкл».
Как выставить время на экране телевизора?
Если телевизор BRAVIA подключен к сети:
- Нажмите кнопку HOME на пульте дистанционного управления.
- Выберите Настройки (Settings).
- В категории Системные настройки (System Preferences) выберите Дата и время ( & ).
- Установите для параметра Автонастройка даты и времени (Automatic & ) настройку Включено (On).
Как установить время на будильнике?
Как установить, отменить или отложить будильник
- На телефоне откройте приложение «Часы» .
- В верхней части экрана нажмите Будильник.
- Выберите будильник. Чтобы добавить будильник, нажмите на плюс . Чтобы сбросить существующий будильник, нажмите на заданное для него время.
- Установите время. Аналоговые часы. …
- Нажмите ОК.
Инструкция и руководство для
Vitek VT-3508 на русском на английском
16 страниц подробных инструкций и пользовательских руководств по эксплуатации
Блендер Vitek VT-3413 (VT-3407) — Обзор
Увлажнитель воздуха VITEK VT-1764
Машинка для стрижки волос ⊙ VITEK VT-1362 G (Ремонт)
соко-вижималка VITEK VT-3655BN
Ремонт часов Vitek VT-3504
Часы Vitek VT 6605
Ремонт радиоприемника «VITEK VT 3582ВК»
Обзор пылесоса Vitek VT-8130 BK
ВИДЕО И БЫТОВАЯ ТЕХНИКА Инструкция по эксплуатации GB RUS UA.
Инструкция по эксплуатации
Инструкция по эксплуатации
Инструкция по эксплуатации
Інструкція з експлуатації
Radio with projector
Радиочасы с проектором
Инструкция по эксплуатации
3508.qxd 11.03.05 16:44 Page 2
English
RADIO WITH ALARM AND PROJECTOR
1. POWER SELECTOR (AUTO/ON/OFF)
2. LED INDICATOR
3. AUTO MODE INDICATOR
4. SNOOZE BUTTON
8. LOW/HIGH DIMMER SWITCH
12.BAND SELECTOR (AM/FM)
14.BACKUP BATTERY COMPARTMENT
17.RADIO FREQUENCY SCALE
18.PROJECTION ON/OFF BUTTON
20.PROJECTOR SET BUTTON
24.ALARM RADIO/BUZZ SELECTOR
AC POWER SUPPLY
Before connecting, make sure that the electrical
supply voltage is compatible with the device’s
• Remove the AC plug from the outlet if the device
will not be used for a long period of .
• Do not attempt to repair this device yourself;
there are no user-serviceable parts inside.
• Do not allow water to splash or spill onto the
device in order to avoid fire and electric shock.
• Do not obstruct the natural ventilation of the
device; do not place it in closed bookshelves or
on shelves were there is not good ventilation.
• Do not place sources of open flames, like can-
dles, on the device.
• In case of mal, an ized
• Open the battery compartment (14) and install
one 6F-22 type 9V battery (not included). The
battery is used to save rmation regarding the
current and alarm settings in case of AC
• Set the AUTO/OFF/ON (1) selector to the Off
position and plug the power plug into the outlet;
the display will start to b.
• To set the current , press and hold the
(6) button, then use the HOUR (10) and MIN (9)
buttons to set the current .
THE CURRENT ON THE AND THE
PROJECTED ARE SET SEPARATELY.
SETTING THE PROJECTED
• To project the current onto the wall, point
the projector away from itself and into a horizon-
• Turn on the projector using the PROJECTION
ON/OFF (18) button; use the FOCUS (23) dial to
achieve a sharp image on the wall.
• To set the current on the projector, press
and hold the (20) button, then use the MIN
(22) and HOUR (21) buttons to set the current
NOTE: THE PROJECTION DISTANCE OF THE
IN A DARK ROOM IS FROM 0.9 TO 2. 7 m.
SETTING THE ALARM
• Press and hold the ALARM (5) button; use the
HOUR (9) and MIN (10) buttons to set the
WAKING UP TO THE RADIO
• Set the alarm as instructed above.
• Set the AUTO/OFF/ON (1) selector to the On
• Tune the radio to the desired ion and adjust
• Set the ALARM RADIO/BUZZ (24) selector to
• Set the AUTO/ON/OFF (1) selector to AUTO.
The alarm will activate at the pre-set and
will automatically turn off after 1 hour and 59
WAKING UP TO BUZZER ALARM
• Set the alarm as indicated above.
• Rotate the VOLUME/BUZZ (24) dial counter-
wise until it clicks in order to activate the
BUZZ alarm mode.
• Set the Auto/Off/On (1) selector to Auto. The
buzzer alarm will activate at the set alarm .
TURNING OFF THE ALARM
• Press the ALARM SET/OFF (5) button to turn off
the alarm; the set alarm remains saved for
use the next day.
• Set the AUTO/ON/OFF (1) selector to the OFF
position to turn off the alarm permanently.
• You can temporarily silence the alarm (buzzer or
radio) by pressing the Snooze (4) button; the
alarm will automatically activate again in 9 min-
Инструкция к часам будильнику с проектором Метеостанция
Не просто будильник, а целая миниатюрная домашняя метеостанция! Думаете, это возможно лишь в футуристичных фильмах о будущем? А вот и нет! С этими часами будильником с проектором Метеостанция вы всегда будете знать не только точное время, которое будет отображаться на стенах и потолке вашего дома, но и температуру воздуха, влажность и даже прогноз погоды!
Для того чтобы войти в режим установки времени, достаточно нажать и удерживать в течение некоторого периода времени (2-3 секунды) кнопку «Режим». После входа в режим настройки времени, вы увидите, что индикаторы часов и минут начнут мигать, это означает, что вход был выполнен вами абсолютно правильно. Нажимая кнопки «вверх» и «вниз», вы можете установить необходимые вам значения часов и минут.
Осуществить вход в режим просмотра времени сигнала будильника вы можете, используя кнопку «Режим». Для того чтобы войти в режим настройки времени сигнала будильника, достаточно еще раз нажать на кнопку «Режим» и удержать ее в таком положении в течение некоторого времени (2-3 секунды). После входа в режим настройки времени будильника, вы заметите, что индикаторы часов и минут начнут мигать, что говорит о том, что вход в данный режим был выполнен вами абсолютно правильно. Теперь вы можете задать необходимое вам значение времени будильника, используя клавиши «вверх» и «вниз».
Использование опций календаря:
Для того чтобы войти в режим настройки календаря, достаточно нажать и удерживать в течение некоторого периода времени (2-3 секунды) кнопку «Режим». После входа в режим задания настроек календаря, вы увидите, что индикаторы года, месяца и дня начнут мигать, это означает, что вход был выполнен вами абсолютно правильно. Используя кнопки «вверх» и «вниз», вы можете задать необходимые вам значения года, месяца и дня.
Включение и выключение будильника:
Для того чтобы включить сигнал будильника, достаточно всего лишь нажать клавишу «вверх».
Температура и влажность:
Для просмотра максимальной температуры и максимального уровня влажности достаточно один раз нажать кнопку «Макс./Мин.».
VITEK
VITEK — это российский бренд, который принадлежит компании Golder Electronics. Корпорация производит бытовую, климатическую и аудио-видео технику. Название компании происходит от латинского «vita» — жизнь и немецкого «technik» — техника.
Компания VITEK была создана в 2000 году и была достаточно успешной. На рынке бренд получил такие премии как «Товар года», «Бренд года-Effie», «Марка № 1 в России» и др.
Бренд VITEK стал единственной торговой маркой малой бытовой техники, которого включили в рейтинг журнала Forbes как «50 самых продаваемых российский торговых марок», и три года подряд он входит в этот список. На сегодня, бренд стал одним из самых узнаваемых производителей бытовой техники в России.
Компания производит такую бытовую технику как:
- DVD-плеер (домашний кинотеатр)
- автомобильный телевизор
- аэрогриль
- блендеры
- ванночка для ног
- вентиляторы
- весы
- инглалятор
- йогуртница
- ионизатор воздуха
- кондиционеры
- кофеварки
- кофемолки
- кухонные комбайны
- маникюрный набор
- массажер
- машинка для стрижки
- микроволновая печь
- мультиварка
- мясорубки
- обогреватель
- пароварки
- пароочиститель
- пылесосы
- соковыжималки
- тепловентилятор
- термопоты
- тостеры
- увлажнитель воздуха
- утюги
- фритюрницы
- хлебопечки
- чайники
- радиочасы и метеостанции
Если Вам нужна VITEK инструкция по эксплуатации, наш сайт поможет Вам найти руководство к любому продукту компании VITEK. Скачать инструкции VITEK очень просто и быстро. Руководства представлены в формате PDF, в хорошем качестве. Кликнув на файл, необходимое руководство загрузится на Ваш компьютер, сохраните его как инструкция ВИТЕК.
Пользуйтесь своей бытовой техникой с удовольствием. Правильная эксплуатация поможет «продлить жизнь» Вашей техники, и она прослужит без поломок еще много лет.
Как настроить часы vitek 120 projection vt 3508
Инструкция и руководство для
Vitek VT-3505 на русском на английском
14 страниц подробных инструкций и пользовательских руководств по эксплуатации
Unboxing VITEK VT-3514
Ремонт часов Vitek VT-3504
Обзор годинника VITEK
#VITEK как настроить часы от компании VITEK.
Радио-будильник Vitek VT-3505 — 3D-обзор от Elmir.ua
Радиочасы с проектором AEG MRC 4119 P
Vitek VT-3506 часы радио проектор
English
English
button (choosing a al for alarm
2 — >, DST, YEAR button
button (choosing a al for alarm
8 — BAND switch (FM/АМ)
9 — AL.SET button (setting and viewing the alarm
10 — SNOOZE/SLEEP button
radio on/off button
14 — Battery compartment lid
15 — RESET button
16 — TUNING knob
17 — LINE IN jack
18 — FOCUS control
20 — Temperature sensor (indoor only)
21 — FM-antenna cord
23 — VOLUME ± control
RISK OF ELECTRIC SHOCK
Warning: To prevent fire or shock hazard do not
expose the appliance to rain or moisture.
To prevent shock hazard do not remove the cover
yourself. Apply to a service centre for repair and
This lightning flash with arrow
symbol, within an equilateral triangle, is
intended to alert the user to the presence
of uninsulated «dangerous voltage» within
the product’s enclosure that may be of
sufficient magnitude to constitute a risk of
electric shock to persons.
The exclamation point within an equilateral
triangle is intended to alert the user to
the presence of important operating and
maintenance (servicing) instructions in the
manual accompanying the appliance.
Please read these instructions carefully before con-
necting, operating or adjusting the unit.
Follow all warnings and operating ations
contained in this manual.
Keep this manual for future reference.
• Check whether the electricity supply in your home
sockets corresponds to the voltage specified on
the housing of the unit.
• In order to avoid risk of fire or electric shock, do
not subject the unit to rain or moisture. Do not
place containers with water, for instance vases,
• Do not immerse the unit into water. To prevent
fire or shock hazard, do not use this unit in high
humidity conditions (near a bath tub, wash bowl,
kitchen sink or laundry washer, in a wet base-
ment, or near a swimming pool, etc.) Prevent the
unit from dripping and splashing.
• Do not overload wall outlets or extension cords as
this can result in a risk of fire or electric shock.
• Place the unit in a way that you could easily pull
the plug out of the socket if there are some dam-
• For additional protection during lighting and in
cases when you are not going to use the unit for
a long , unplug the unit. It will prevent the unit
from failure during lighting and power surges.
• To unplug the unit, hold its plug. Do not pull the
• In order to avoid electric shock do not remove the
cover yourself. Do not repair and do not modify
the unit. Technical maintenance must be per-
formed only by qualified service personnel.
• Install the unit in places with proper ventilation.
Do not block the ventilation openings of the unit.
• Do not connect the FM-antenna with the external
• The product should be situated away from heat
sources such as radiators, heat registers, stoves,
or other products that produce heat. Do not ex-
pose the unit to direct sunlight, excessive dust,
vibration or mechanical shocks. Do not place the
unit near sources of open fire, such as candles.
• Provide that foreign object do not get in the open-
ings of the unit.
• Close supervision is necessary when the unit is
used by children or disabled persons.
• Keep the unit out of reach of children.
• Do not allow children to use the unit as a toy.
• Open the battery compartment lid and insert a 3V
CR2032 battery (not supplied), following the po-
English
• Close the battery compartment lid.
Attention! Battery leakage can lead to injuries or
damages of the unit. In order to avoid damaging of
the unit, follow the following instructions:
— insert the battery properly;
— remove the battery if you are not planning to use
the unit for a long ;
— do not recharge, do not dismantle, and do not
subject the battery to high temperatures;
— replace the battery in .
The unit is intended for operation from the mains,
battery operation is a reserve option.
The battery helps to store the settings while switch-
ing off, or absence of power.
Remove the battery if you are not planning to use
the unit for a long .
Connecting the unit
Before connecting the unit, make sure that the elec-
tricity supply in your home sockets corresponds to
the voltage specified on the housing of the unit.
Insert the plug into the socket.
Listening to the radio
button to start listening to the ra-
2. Select the desired band (FM or AM), by pressing
the BAND button. The corresponding al will
appear on the display.
3. Rotate the TUNING knob to tune to the desired
4. Use the VOLUME control to set the required vol-
5. After you finish listening to the radio, press the
button once again.
Note: For better receipt of FM ions we re
mend full unwinding of the FM-antenna cord and its
optimal location. For better receipt of AM ions,
try several options of the unit location.
Setting the current and
In the current mode press and hold the MODE
button for more than 2 seconds to enter the Setting
current and mode.
The year digits will start flashing on the display. Use
the > buttons to set the year.
Press the MODE button. The month digits will start
flashing on the display. Use the > buttons to
Press the MODE button. The day digits will start
flashing on the display. Use the > buttons to
Press the MODE button. format symbols will
start flashing on the display: 24-hour format or 12-
hour format. Use the > buttons to select the
Press the MODE button. The hour digits will start
flashing on the display. Use the > buttons to
Press the MODE button. The minute digits will start
flashing on the display. Use the > buttons to
Note: If during 2 seconds the > buttons are
not pressed, the unit will switch to the current
In the current mode, press the > button to display the year.
In 5 seconds the unit will switch to the current
Press and hold the >> button for more than 3 sec-
ond to go on daylight saving and back.
Setting temperature units (С/F)
Press and hold the > buttons to set the hour.
Press the AL.SET button. Minute digits will start
flashing on the display. Use the > buttons to
Press the AL.SET button. Alarm actuation symbols
will start flashing on the display. Use the > but-
tons to select the necessary mode:
1 — 5: alarm actuation from Monday till Friday;
1 -7: alarm actuation from Monday till Sunday;
6 — 7: alarm actuation in Saturday and Sunday;
1 — 1: alarm actuation once a week.
In the same manner the actuation and of
Alarm 2 can be set.
Note: If during 2 seconds the > buttons are
not pressed, the unit will switch to the current
Alarms al type selection, alarm on/off
Consequently press AL.1/ AL.2 to select radio
English
) as alarm als or you can
switch off alarm.
Set the DIMMER to the AUTO OFF position. In this
case when the alarm is activated, the display will
switch on as well.
Alarm al will be continued during 30 minutes if
you do not press any buttons.
You can switch off the alarm al for 9 minutes by
pressing of the SNOOZE button. In 9 minutes the
alarm al will be repeated.
To switch off alarm snooze , press the
button, if radio is selected as alarm al, it will
switch off automatically in 30 minutes.
Set the DIMMER to the AUTO OFF position. During
switching on the display, press the SNOOZE/SLEEP
button to switch on the alarm snooze , the
alarm al and the display will switch on.
Auto switching off the radio
You can set the for the radio to switch off. In the
radio mode press the SNOOZE/SLEEP button, «90»
will appear on the display, and the radio will switch
off automatically in 90 minutes. To reduce the ,
press the SNOOZE/SLEEP button, symbols 60-30-
15 will be displayed. In the present the radio will
switch off. If you want to switch off the radio before
the preset , press the
Switching off the display lighting
When the radio is switched off, set the DIMMER
switch to the AUTO OFF position and in 15 seconds
the display lighting will switch off automatically.
Press any button to switch it on.
Use a ball-point pen to press the RESET button
when replacing the battery or if the unit malfunc-
tions, the settings will return to the default ones, all
the stored data (current and alarms settings)
To project , turn the projector in the necessary
direction. Switch on the projector, by pressing the
PROJECTION ON/OFF button.
To focus the projected image, rotate the FOCUS
control. To turn the projected image to 180° press
the 180° FLIP button.
Press the PROJECTION ON/OFF button to switch
off the projector.
Note: The unit projects the image on the ceiling or
the wall of the darkened room. Maximal distance is
Connecting the external device
To connect the external device use the LINE IN jack
Connect the external device using the 3,5 mm Jack
audio cable (not supplied with the unit).
button to listen to the sound from the
external device. Use the VOLUME control to set the
desired volume level.
Note: Electromagnetic interferences can influence
operation of the unit. In this case disconnect the unit
from the power sources, and then connect again. If
necessary change the location of the unit.
Unplug the unit before cleaning. Use a soft cloth
to clean the unit. Do not use liquid or aerosol sub-
stances for cleaning.
Power supply: 240 V AC, 50 Hz;
Reserve power supply: Battery 3V CR2032
Power consumption: >, DST, YEAR
7 — кнопка выбора типа сигналов для второго бу-
8 — кнопка BAND переключения диапазонов FM/
9 — кнопка установки и просмотра времени вклю-
чения будильника AL.SET
10 — кнопка повтора сигналов будильника / авто-
матического отключения радио SNOOZE/SLEEP
11 — кнопка переключения режимов MODE
12 — кнопка включения/выключения радио
14 — крышка батарейного отсека
15 — кнопка сброса RESET
16 — регулятор настройки радиостанций TUNING
17 — гнездо LINE IN
18 — регулятор фокуса FOCUS
20 — температурный датчик (только для помеще-
21 — провод FM-антенны
22 — сетевой шнур
23 — регулятор уровня громкости VOLUME ±
24 — переключатель режимов подсветки дисплея
Предупреждение: Во избежание возникновения
пожара или поражения электрическим током не
подвергайте устройство воздействию дождя или
влаги. Во избежание удара электрическим током
не открывайте корпус устройства самостоятель-
но. Сервисное обслуживание должно осущест-
вляться только квалифицированными специалис-
тами сервисных центров.
Значок молнии в равностороннем треу-
гольнике указывает пользователю на нали-
чие опасного напряжения внутри корпуса
устройства, которое может привести к
поражению электрическим током.
Значок восклицательного знака в равносто-
роннем треугольнике указывает пользова-
телю на наличие важных рекомендаций по
эксплуатации и техническому обслужива-
нию в инструкции по эксплуатации.
Перед подключением, использованием и на-
стройкой устройства внимательно прочитайте
Необходимо соблюдать все предупреждения и
рекомендации по эксплуатации устройства, при-
веденные в этой инструкции.
Сохраните инструкцию, используйте ее в даль-
нейшем в качестве справочного материала.
• Проверьте, соответствует ли напряжение в
электрической сети рабочему напряжению ус-
• Во избежание возникновения пожара или по-
ражения электрическим током не подвергайте
устройство воздействию дождя или влаги. Не
ставьте на устройство емкости с водой, напри-
• Запрещается погружать прибор в воду. Во из-
бежание возникновения пожара или пораже-
ния электрическим током не размещайте это
устройство в условиях повышенной влажности
(около ванн, тазов с водой, кухонных раковин,
стиральных машин, рядом с плавательным
бассейном, в сырых подвалах и т.д.) Не до-
пускайте попадания на устройства капель или
• Не допускайте перегрузки розеток или удли-
нителей, так как это может привести к пожару
или поражению электрическим током.
• Установите это устройство таким образом,
чтобы в случае неисправности вилку сетевого
провода можно было немедленно вынуть из
• Для дополнительной защиты устройства во
время грозы, а также в тех случаях, когда вы не
собираетесь использовать его в течение дли-
тельного времени, отключите его от розетки
электросети. Это исключит выход устройства
из строя из-за ударов молнии или скачков на-
пряжения в электросети.
Инструкция и руководство для
Vitek VT-3508 на русском на английском
16 страниц подробных инструкций и пользовательских руководств по эксплуатации
Блендер Vitek VT-3413 (VT-3407) — Обзор
Увлажнитель воздуха VITEK VT-1764
Машинка для стрижки волос ⊙ VITEK VT-1362 G (Ремонт)
соко-вижималка VITEK VT-3655BN
Ремонт часов Vitek VT-3504
Часы Vitek VT 6605
Ремонт радиоприемника «VITEK VT 3582ВК»
Обзор пылесоса Vitek VT-8130 BK
ВИДЕО И БЫТОВАЯ ТЕХНИКА Инструкция по эксплуатации GB RUS UA.
Инструкция по эксплуатации
Инструкция по эксплуатации
Инструкция по эксплуатации
Інструкція з експлуатації
Radio with projector
Радиочасы с проектором
Инструкция по эксплуатации
3508.qxd 11.03.05 16:44 Page 2
English
RADIO WITH ALARM AND PROJECTOR
1. POWER SELECTOR (AUTO/ON/OFF)
2. LED INDICATOR
3. AUTO MODE INDICATOR
4. SNOOZE BUTTON
8. LOW/HIGH DIMMER SWITCH
12.BAND SELECTOR (AM/FM)
14.BACKUP BATTERY COMPARTMENT
17.RADIO FREQUENCY SCALE
18.PROJECTION ON/OFF BUTTON
20.PROJECTOR SET BUTTON
24.ALARM RADIO/BUZZ SELECTOR
AC POWER SUPPLY
Before connecting, make sure that the electrical
supply voltage is compatible with the device’s
• Remove the AC plug from the outlet if the device
will not be used for a long period of .
• Do not attempt to repair this device yourself;
there are no user-serviceable parts inside.
• Do not allow water to splash or spill onto the
device in order to avoid fire and electric shock.
• Do not obstruct the natural ventilation of the
device; do not place it in closed bookshelves or
on shelves were there is not good ventilation.
• Do not place sources of open flames, like can-
dles, on the device.
• In case of mal, an ized
• Open the battery compartment (14) and install
one 6F-22 type 9V battery (not included). The
battery is used to save rmation regarding the
current and alarm settings in case of AC
• Set the AUTO/OFF/ON (1) selector to the Off
position and plug the power plug into the outlet;
the display will start to b.
• To set the current , press and hold the
(6) button, then use the HOUR (10) and MIN (9)
buttons to set the current .
THE CURRENT ON THE AND THE
PROJECTED ARE SET SEPARATELY.
SETTING THE PROJECTED
• To project the current onto the wall, point
the projector away from itself and into a horizon-
• Turn on the projector using the PROJECTION
ON/OFF (18) button; use the FOCUS (23) dial to
achieve a sharp image on the wall.
• To set the current on the projector, press
and hold the (20) button, then use the MIN
(22) and HOUR (21) buttons to set the current
NOTE: THE PROJECTION DISTANCE OF THE
IN A DARK ROOM IS FROM 0.9 TO 2. 7 m.
SETTING THE ALARM
• Press and hold the ALARM (5) button; use the
HOUR (9) and MIN (10) buttons to set the
WAKING UP TO THE RADIO
• Set the alarm as instructed above.
• Set the AUTO/OFF/ON (1) selector to the On
• Tune the radio to the desired ion and adjust
• Set the ALARM RADIO/BUZZ (24) selector to
• Set the AUTO/ON/OFF (1) selector to AUTO.
The alarm will activate at the pre-set and
will automatically turn off after 1 hour and 59
WAKING UP TO BUZZER ALARM
• Set the alarm as indicated above.
• Rotate the VOLUME/BUZZ (24) dial counter-
wise until it clicks in order to activate the
BUZZ alarm mode.
• Set the Auto/Off/On (1) selector to Auto. The
buzzer alarm will activate at the set alarm .
TURNING OFF THE ALARM
• Press the ALARM SET/OFF (5) button to turn off
the alarm; the set alarm remains saved for
use the next day.
• Set the AUTO/ON/OFF (1) selector to the OFF
position to turn off the alarm permanently.
• You can temporarily silence the alarm (buzzer or
radio) by pressing the Snooze (4) button; the
alarm will automatically activate again in 9 min-
Русский — Инструкция по эксплуатации Vitek VT-3508
Страница 5
РАДИО ЧАСЫ БУДИЛЬНИК С ПРОЕКТОРОМ
1. ПЕРЕКЛЮЧАТЕЛЬ (POWER) АВТО/ВКЛ/ВЫКЛ
2. СВЕТОДИОДНЫЙ ИНДИКАТОР
3. ИНДИКАТОР РЕЖИМА АВТО (AUTO)
4. ВКЛЮЧЕНИЕ РЕЖИМА КОРОТКОГО
СНА/ОТКЛЮЧЕНИЕ ТАЙМЕРА (SNOOZE)
5. УСТАНОВКА/ОТКЛЮЧЕНИЕ БУДИЛЬНИКА
6. УСТАНОВКА ВРЕМЕНИ (SET/OFF TAME)
7. УСТАНОВКА ТАЙМЕРА ОТКЛЮЧЕНИЯ (SLEEP)
8. ПЕРЕКЛЮЧАТЕЛЬ (DIMMER) ЯРКОСТЬ
ДИСПЛЕЯ НИЗКАЯ/ВЫСОКАЯ (LOW/HIGH)
9. УСТАНОВКА ЧАСОВ (HOUR)
10.УСТАНОВКА МИНУТ (MIN)
11.РЕГУЛЯТОР ГРОМКОСТИ РАДИО (VOLUME)
12.ПЕРЕКЛЮЧАТЕЛЬ ЧАСТОТНОГО ДИАПАЗОНА
13.НАСТРОЙКА РАДИО (TUNING)
14.ОТСЕК БАТАРЕИ РЕЗЕРВНОГО ПИТАНИЯ
17.УКАЗАТЕЛЬ ШКАЛЫ НАСТРОЙКИ РАДИО
18.ВКЛ/ВЫКЛ ПРОЕКТОРА (PROJETION ON/OFF)
20.КНОПКА УСТАНОВКИ ВРЕМЕНИ
ПРОЕКЦИОННЫХ ЧАСОВ (TAME)
21.КНОПКА УСТАНОВКИ ЧАСА ПРОЕКЦИОННЫХ
22.КНОПКА УСТАНОВКИ МИНУТ
ПРОЕКЦИОННЫХ ЧАСОВ (MIN)
23.РЕГУЛИРОВКА ФОКУСА (FOCUS)
24.ПЕРЕКЛЮЧАТЕЛЬ БУДИЛЬНИКА РАДИО /
ЗУММЕР (ALARM RADIO/BUZZ)
ПИТАНИЕ ОТ СЕТИ ПЕРЕМЕННОГО ТОКА
Перед включением убедитесь, что
напряжение электрической сети,
соответствует рабочему напряжению
• Вынимайте сетевую вилку из розетки, если
не пользуетесь устройством длительное
• Не разбирайте устройство самостоятельно,
внутри нет деталей, которые обслуживаются
• Для предотвращения пожара и опасности
поражения током не допускайте попадания
воды в корпус устройства.
• Запрещается нарушать условия
естественной вентиляции устройства, не
ставьте устройство в закрытые книжные
шкафы или на полки, где нет достаточной
• Запрещается ставить на устройство
источники открытого пламени, такие как
• При обнаружении неисправности
обращайтесь в авторизованный сервисный
• Откройте крышку батарейного отсека (14) и
установите батарейку типа 6F-22
напряжением 9В. Батарейка используется
для сохранения информации о текущем
времени и времени установки будильника,
при пропадании сетевого напряжения.
• Установите переключатель AUTO/ON/OFF (1)
в положение OFF и вставьте сетевую вилку в
розетку, при этом показания на дисплее
• Для установки текущего времени нажмите и
удерживайте кнопку SET/OFF (6),
кнопками MIN (10) è HOUR (9) установите
ТЕКУЩЕЕ ВРЕМЯ НА ЧАСАХ И
ПРОЕКЦИОННЫХ ЧАСАХ УСТАНАВЛИВАЕТСЯ
УСТАНОВКА ВРЕМЕНИ ПРОЕЦИОННЫХ
• Для проецирования показаний часов на
стену, выдвиньте проектор по направлению
от себя и поверните его в горизонтальной
• Включите проектор кнопкой PROJETION
ON/OFF (18), регулятором FOCUS (23)
добейтесь четкого изображения на стене.
• Для установки текущего времени
проекционных часов, нажмите и удерживайте
кнопку (20), кнопками MIN (22) è HOUR
(21) установите текущее время.
ЗАМЕЧАНИЕ: ВОЗМОЖНОЕ РАССТОЯНИЕ
ПРОЕЦИРОВАНИЯ ПОКАЗАНИЙ ЧАСОВ В
ЗАТЕМНЕННОЙ КОМНАТЕ ОТ 0,9 до 2, 7 м.
УСТАНОВКА ВРЕМЕНИ ВКЛЮЧЕНИЯ
• Нажмите и удерживайте кнопку ALARM
SET/OFF (5), кнопками HOUR (9) è MIN (10)
установите необходимое время включения
УСТАНОВКА БУДИЛЬНИКА НА
ПРОБУЖДЕНИЕ ПОД РАДИО
• Установите время включения будильника как
English — Инструкция по эксплуатации Vitek VT-3508
Страница 3
RADIO WITH ALARM AND PROJECTOR
1. POWER SELECTOR (AUTO/ON/OFF)
2. LED INDICATOR
3. AUTO MODE INDICATOR
4. SNOOZE BUTTON
8. LOW/HIGH DIMMER SWITCH
12.BAND SELECTOR (AM/FM)
14.BACKUP BATTERY COMPARTMENT
17.RADIO FREQUENCY SCALE
18.PROJECTION ON/OFF BUTTON
20.PROJECTOR SET BUTTON
24.ALARM RADIO/BUZZ SELECTOR
AC POWER SUPPLY
Before connecting, make sure that the electrical
supply voltage is compatible with the device’s
• Remove the AC plug from the outlet if the device
will not be used for a long period of .
• Do not attempt to repair this device yourself;
there are no user-serviceable parts inside.
• Do not allow water to splash or spill onto the
device in order to avoid fire and electric shock.
• Do not obstruct the natural ventilation of the
device; do not place it in closed bookshelves or
on shelves were there is not good ventilation.
• Do not place sources of open flames, like can-
dles, on the device.
• In case of mal, an ized
• Open the battery compartment (14) and install
one 6F-22 type 9V battery (not included). The
battery is used to save rmation regarding the
current and alarm settings in case of AC
• Set the AUTO/OFF/ON (1) selector to the Off
position and plug the power plug into the outlet;
the display will start to b.
• To set the current , press and hold the
(6) button, then use the HOUR (10) and MIN (9)
buttons to set the current .
THE CURRENT ON THE AND THE
PROJECTED ARE SET SEPARATELY.
SETTING THE PROJECTED
• To project the current onto the wall, point
the projector away from itself and into a horizon-
• Turn on the projector using the PROJECTION
ON/OFF (18) button; use the FOCUS (23) dial to
achieve a sharp image on the wall.
• To set the current on the projector, press
and hold the (20) button, then use the MIN
(22) and HOUR (21) buttons to set the current
NOTE: THE PROJECTION DISTANCE OF THE
IN A DARK ROOM IS FROM 0.9 TO 2. 7 m.
SETTING THE ALARM
• Press and hold the ALARM (5) button; use the
HOUR (9) and MIN (10) buttons to set the
WAKING UP TO THE RADIO
• Set the alarm as instructed above.
• Set the AUTO/OFF/ON (1) selector to the On
• Tune the radio to the desired ion and adjust
• Set the ALARM RADIO/BUZZ (24) selector to
• Set the AUTO/ON/OFF (1) selector to AUTO.
The alarm will activate at the pre-set and
will automatically turn off after 1 hour and 59
WAKING UP TO BUZZER ALARM
• Set the alarm as indicated above.
• Rotate the VOLUME/BUZZ (24) dial counter-
wise until it clicks in order to activate the
BUZZ alarm mode.
• Set the Auto/Off/On (1) selector to Auto. The
buzzer alarm will activate at the set alarm .
TURNING OFF THE ALARM
• Press the ALARM SET/OFF (5) button to turn off
the alarm; the set alarm remains saved for
use the next day.
• Set the AUTO/ON/OFF (1) selector to the OFF
position to turn off the alarm permanently.
• You can temporarily silence the alarm (buzzer or
radio) by pressing the Snooze (4) button; the
alarm will automatically activate again in 9 min-
Источник