- Steam link android как настроить сенсорное управление
- Steam link android как настроить сенсорное управление
- Steam link android как настроить сенсорное управление
- Играем в игры Steam на Android! (настраиваем Steam Link)
- Играем в игры Steam на Android или Android TV
- Первоначальная настройка подключения Steam Link
- Как играть?
- Steam link android как настроить сенсорное управление
Steam link android как настроить сенсорное управление

Краткое описание:
Привязка геймпада, стриминг через локальную сеть
Описание:
Приложение Steam Link перенесёт компьютерные игры на ваше устройство с Android. Просто привяжите Bluetooth-геймпад или Steam Controller к своему устройству, подключитесь к компьютеру с запущенным Steam в той же локальной сети и играйте в свои игры из Steam.
Для наилучшей производительности с Android TV:
* Подключите компьютер к маршрутизатору по сетевому кабелю
* Подключите Android TV к маршрутизатору по сетевому кабелю
Для наилучшей производительности с планшетами и телефонами:
* Подключите компьютер к маршрутизатору с частотой 5 ГГц по сетевому кабелю
* Подключите устройство с Android к WiFi-сети на частоте 5 ГГц
* Не отходите слишком далеко от маршрутизатора
Для работы необходим клиент Steam для ПК!
Русский интерфейс: Да
Версия: 1.1.33 Сообщение №523, автор m90.tass
Версия 1.1.30 [BETA]
1.1.29
1.1.27
1.1.20
1.1.15
1.1.14
1.1.7
1.1.4
1.1.3
1.1.2
1.1.1 Steam Link 1.1.0.apk ( 30,54 МБ )
Сообщение отредактировал iMiKED — 30.07.21, 07:55
Отписываюсь по результатам. Долго мучился со своим геймпадом, но все таки смог его подключить к смартфона через Usb/BT joystick. Выбрал там эмуляцию гейпада от 360 и Стим Линк сразу же его распознал. Без этой программы он мой гейпад не видел. Скорость интернета у меня всего 30 Мбит. Попробовал поиграть рокет лигу, и скажу что это не реально. Задержка где то 1 секунда, иногда бывает меньше, иногда вообще фризит на несколько секунд. И да, задержки вызваны именно скоростью подключения, гейпад передает команды компьютеру моментально. Пубг не распознал гейпад и я не смог поиграть, хотя если подключить гейпад к ПК то он его сразу подхватывает. Других игр с поддержкой гейпада к сожалению нет установленных на данный момент, но завтра установлю ГТА 5 и Ведьмака 3 и протестирую их. Также сравню с moonlight, посмотрю где задержки меньше.
Сообщение отредактировал dimarei — 18.05.18, 02:35
Источник
Steam link android как настроить сенсорное управление
Краткое описание:
Привязка геймпада, стриминг через локальную сеть
Описание:
Приложение Steam Link перенесёт компьютерные игры на ваше устройство с Android. Просто привяжите Bluetooth-геймпад или Steam Controller к своему устройству, подключитесь к компьютеру с запущенным Steam в той же локальной сети и играйте в свои игры из Steam.
Для наилучшей производительности с Android TV:
* Подключите компьютер к маршрутизатору по сетевому кабелю
* Подключите Android TV к маршрутизатору по сетевому кабелю
Для наилучшей производительности с планшетами и телефонами:
* Подключите компьютер к маршрутизатору с частотой 5 ГГц по сетевому кабелю
* Подключите устройство с Android к WiFi-сети на частоте 5 ГГц
* Не отходите слишком далеко от маршрутизатора
Для работы необходим клиент Steam для ПК!
Русский интерфейс: Да
Версия: 1.1.33 Сообщение №523, автор m90.tass
Версия 1.1.30 [BETA]
1.1.29
1.1.27
1.1.20
1.1.15
1.1.14
1.1.7
1.1.4
1.1.3
1.1.2
1.1.1Steam Link 1.1.0.apk ( 30,54 МБ )
Сообщение отредактировал iMiKED — 30.07.21, 07:55
Отписываюсь по результатам. Долго мучился со своим геймпадом, но все таки смог его подключить к смартфона через Usb/BT joystick. Выбрал там эмуляцию гейпада от 360 и Стим Линк сразу же его распознал. Без этой программы он мой гейпад не видел. Скорость интернета у меня всего 30 Мбит. Попробовал поиграть рокет лигу, и скажу что это не реально. Задержка где то 1 секунда, иногда бывает меньше, иногда вообще фризит на несколько секунд. И да, задержки вызваны именно скоростью подключения, гейпад передает команды компьютеру моментально. Пубг не распознал гейпад и я не смог поиграть, хотя если подключить гейпад к ПК то он его сразу подхватывает. Других игр с поддержкой гейпада к сожалению нет установленных на данный момент, но завтра установлю ГТА 5 и Ведьмака 3 и протестирую их. Также сравню с moonlight, посмотрю где задержки меньше.
Сообщение отредактировал dimarei — 18.05.18, 02:35
Источник
Steam link android как настроить сенсорное управление
The mobile version of Steam Link has support for an on-screen touch controller. This is enabled by default if you don’t already have a controller connected to your mobile device.
When you connect with the touch controller enabled, a [] button will appear in the upper left corner of your screen, and you can click this button to change modes.
The controller has three ‘modes’ of operation:
MOUSE: This is the mode that Steam Link used to work in, where the touchscreen works like a mouse pointer.
CONTROLLER: This mode is exclusively a controller; touches will only be handled by controller controls laid out on the screen.
CONTROLLER/MOUSE: This is a hybrid mode, where touches that aren’t on the controller controls — e.g., touches on the ‘background’ — will still be passed through as mouse input.
The controller can be easily changed on the fly between the three modes by tapping the [] button and selecting ‘Change Mode’. If you have mouse active (in either MOUSE or CONTROLLER/MOUSE modes), the [] button will have a small icon of a mouse above the dots.
The controller mode and on-screen controls and are customized individually for each game, and for games that support Steam Input, you can customize each actionset in the game.
The heart of the editing mode is the tray, which will pop up when you pick ‘Layout Controls’ from the [] button. From here, you can drag controls out of the tray to place them, select ‘Edit Layout’ to move/scale/remove existing controls, ‘Cancel’ to clear all changes since you last saved, or ‘Done’ to save your changes.
Only the controls which are bound are available. For instance, if there are no macros configured, the macro buttons (M1 through M8) will be grayed out. You can change bindings and add new ones using the standard Steam Big Picture controller configuration UI.
To place a control, simply touch it and begin dragging it. The tray will close, and you can place the control where you want. If you grab the button diamond or the Select/Steam/Start buttons, they will come together as a group for quick placement.
When in edit mode, the screen background will be a transparent blue over the running game, letting you know that you are in edit mode. You can touch a single control to select and drag it, use two fingers to scale, or you can use one finger alone to draw a selection box and select multiple controls to move/scale at once. If you’ve placed a control before, it will remember the last location and show a gray «ghost» you can drag over to snap into. If you want to remove a control, simply drag it over towards the [] button, which will turn into a trashcan.
When dragging controls around, they will also snap into default positions relative to other related controls. If you don’t like that location, simply keep moving, or lift your finger and drag again to make small adjustments.
The Steam Link touch controller is a first class citizen of the Steam Input ecosystem, which means you can bind controls, create actionsets, use touchpad areas and your device’s gyro, and publish configurations just like you would for any other controller. We will also work with developers to create touch layouts for their games and add other advanced features in the future.
Please use this thread for any feedback related to the touch controls!
Источник
Играем в игры Steam на Android! (настраиваем Steam Link)
Хотели ли бы сыграть в Ведьмака 3 на Android или Android TV? Если раньше это было что-то из рода фантастики, то теперь можно играть в игры Steam на Android c помощью стримингового сервиса Steam Link! Рассказываем как все настроить!
Не так давно компания Valve выпустила специальное приложение Steam Link, которое пока что находиться в бета-тесте, но позволяет вам начать удобно на диване играть с вашего Android устройства в компьютерные игры, приобретенные в магазине Steam.
Играем в игры Steam на Android или Android TV
Для того чтобы начать играть в компьютерные игры на Android вам понадобиться вот что:
- Компьютер с клиентом Steam и играми
- Android с установленным приложением Steam Link
Для лучшего соединения с Android TV:
- Подключите ПК к роутеру по кабелю Ethernet (сетевой кабель)
- Подключите Android TV к маршрутизатору по сетевому кабелю
Для лучшего соединения с Android телефонами и планшетами:
- Подключите компьютер к роутеру по сетевому кабелю
- Подключите Android к WiFi-сети на частоте 5 ГГц (можно 2.4, качество будет хуже)
Как вы наверно должны были понять, играть можно только в рамках одной сети, которую раздает роутер.
Первоначальная настройка подключения Steam Link
Теперь давайте займемся первоначальной настройкой подключения Steam Link к Steam.
- Запустите Steam на компьютере
- Перейдите в настройки Steam и убедитесь в том, что включена «домашняя трансляция»
- Запустите Steam Link на Android
- Если у вас есть контроллер (геймпад) подключите его к Android, либо пропустите данный шаг
- Начнется поиск компьютера, если все прошло хорошо, то появиться окно с информацией о доступном подключение к компьютеру, выбираем его
- Если вы не ошиблись, то вас попросят ввести пин-код выданный на Android который необходимо ввести на компьютере в Steam
- Теперь можете нажать начать, чтобы вывести изображение на экран Android
- Выберите игру из вашей библиотеки
- И можете начать играть в любимые ПК игры на Android
Как играть?
На данный момент существует проблема с управлением по геймпаду, нужно покупать довольно качественные устройства управления и настраивать в Steam Link, либо же настроить джойстик в Steam на ПК.
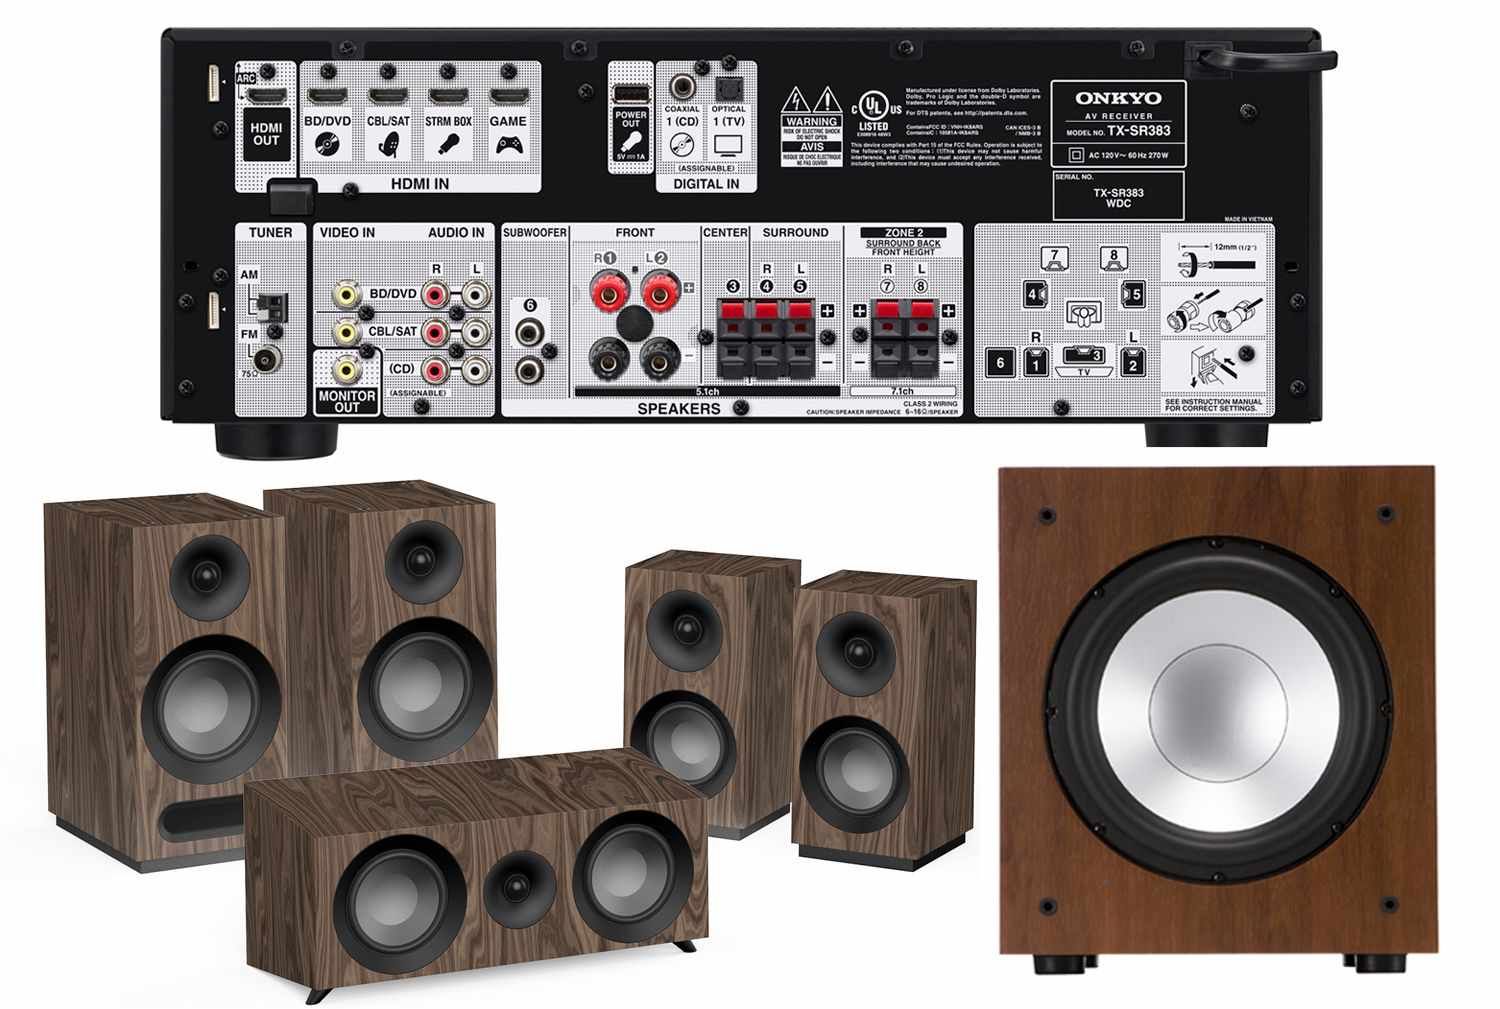
Список наиболее совместимых геймпадов с Steam Link:
- Steam Controller
- GameSir G4s
- Razer Serval
- Sony DualShock V2
- XBOX One Nottingham
- Ipega PG-9023
- Gamesir T2a
Либо же на Android TV подключать через USB порты беспроводную клавиатуру или мышь. На телефонах и планшетах Android, через OTG подключить также беспроводную клавиатуру или мышь.
У вас еще остались дополнительные вопросы? Задавайте их в комментариях, рассказывайте о том, что у вас получилось или наоборот!
Вот и все! Оставайтесь вместе с сайтом Android +1, дальше будет еще интересней! Больше статей и инструкций читайте в разделе Статьи и Хаки Windows.
Источник
Steam link android как настроить сенсорное управление


| 3,205 | уникальных посетителей |
| 94 | добавили в избранное |

The first two sections are a brief overview of Steam Link and the Steam Link app’s Remote Play Touch Controller along with configs. If you are already familiar with them, you can skip to Touch Controller in Steam Link to get started.
Warning: This guide is extremely GIF heavy, so it may take a while to load (currently, loading this guide will use about 350 MB of data). Due to GIF optimization reasons, gameplay in them will be faster than normal.
The content of this guide is up to date with Steam Link version 1.1.81 (there have been UI changes in 1.1.75, so while the content of this guide remains relevant, some of the UI in the pictures and gifs will be a bit different from the app). For looking up the current version and patch notes for the app, refer to Steam Link Android Patch Notes.
In case you are not familiar with Steam Link, it can refer to two different things that Valve has created: the Steam Link hardware box sold between 2015 and 2018 (this set-top box is no longer being sold), and the Steam Link app launched in 2018 (available for free on Android, iOS, Raspberry Pi, Windows, Mac, Linux, Samsung Smart TVs, and more).
They both serve the same purpose: games from your computer running Steam can be streamed to and played on a device running the Steam Link app or on the Steam Link hardware, whether both the computer and device are on the same network or on different networks (how well it works between different networks depends on the download and upload speeds along with ping/latency of both networks).
For example, you can locally stream a game from your computer in the living room to your phone running Steam Link in the bedroom by having both devices connected to your router’s wireless network, and you can also remotely stream a game from your computer at home to your phone over the internet.
Steam Link and Steam Remote Play allows you to stream computer games from your computer to your device, whether they are both on the same network or over the internet.
There are no fees for streaming; the only things you pay for are the games that you buy for your Steam account. As a side note, you are also able to stream between computers using the Steam client.
The focus of this guide will be on the Touch Controller in the Steam Link app on Android and iOS.
If you do not have a gamepad connected to your smartphone or tablet, you can play games using the app’s on-screen controller called the Remote Play Touch Controller. When you launch a game, the various controls, such as buttons and D-pad, are placed on top of the screen, allowing you to play as though you are using a physical controller. This guide will cover all aspects of creating a layout for the touch controls.
In the Steam client, the Controller Configuration, also known as the Steam Input Configurator (SIC), allows you to customize controls bindings for any of your controllers, such as the Steam Controller, Xbox One Controller, PlayStation DualSense Controller, Nintendo Switch Pro Controller, and the Steam Link app’s Touch Controller (Steam is compatible with many controllers, including third-party ones). These bindings are also called configs, and you are able to create configs for each game you have through the Controller Configuration. This guide will cover the basics of creating a config.
The combination of the layout of controls in the Steam Link app and the Controller Configuration in the Steam client is what makes playing PC games on a touch screen device viable.
Note:
- The Remote Play Touch Controller is also available to use on a Windows tablet running the Steam client when streaming from a host computer. To use it, open the Steam client on your tablet (client computer) -> press Steam on the menu bar -> Settings -> Remote Play -> Advanced Client options -> check mark Enable Touch Controls. The next time you stream a game to your tablet, the Touch Controls will appear on your tablet’s screen. I recommend starting streams through Big Picture Mode.
Some short clips demonstrating the Touch Controller (somehow during the GIF optimization process, the below clips ended up being slightly distorted; i.e. the joysticks should be circles, not shaped as ovals).


All of these clips in a longer form along with all configs that I have shared to the community so far can be found at Steam Link Discussions — Chronos’s List of Configs for Steam Link Touch Controller.
For a list of games in the Steam store that have ready-to-use touch controls, refer to Remote Play on Phone and Remote Play on Tablet hubs.
When you launch the Steam Link app, it will look like the following:
The bottom row of icons are quick links to games that you have recently played. Pressing any of these will launch the app directly into that game.
If you have a physical controller connected to your smartphone/tablet, either disconnect it or go into Settings -> Controller -> and select Touch Controller. Your active controller will now be the on-screen Touch Controller. Hit Start Playing.
After the app has connected to your computer and finished loading, you will encounter Big Picture Mode (BPM), which is the alternate interface of the Steam client. By default you will be launched into your Library with a filter that shows your installed games that are Remote Play Optimized.
The touch controls for BPM will appear.
Controls on the screen:
- Steam Link’s Tray: Access the Touch Controller and Mouse settings.
- Touch Controller’s Guide button: When you are in a game, press this to bring up the Steam Overlay.
- Keyboard: Toggles your phone’s keyboard for typing input. Note that the position of this button should be above your phone’s keyboard so it can be conveniently pressed again to hide it.
- D-pad
- Button pad
Notes:
- You can also launch the app into the main menu of Big Picture Mode or your desktop by going to the main menu of Steam Link -> enter Settings via the cog icon at the top-right corner -> Streaming -> Advanced -> and then choosing between the three options under Start Streaming: Recent games (default), Big Picture (main menu of Big Picture Mode), and Desktop.
- When launching with Recent games, you can view the rest of your Library by turning off the filter on the right hand side.
- When launching with Big Picture, no filter is applied to the Library.
- If you are sitting next to the computer running Steam, note that the controls do not show on your computer’s monitor.
- If you are on iOS, the Store will not be available to you when using the Steam Link app.
- If your desktop’s resolution is set to 16:9 ratio and you stream it to a device with a screen that is not 16:9, you will get black bars along the left and right (if your device’s screen is wider) or along the top and bottom (if your device’s screen is taller) sides of the screen.
- By default, if you do not touch your device’s screen for 10 seconds, the controls will fade away. Touching the screen again will bring them back. This can be changed via the Steam Link menu icon [. ] at the top-left.
Before moving on, to stop streaming use the D-pad to move to the power button at the upper right corner -> Stop Remote Play. This will disconnect the app from your computer. You can also choose Exit Steam, but that means that Steam will quit on your computer and you will not be able to stream again until you go to your computer and launch Steam.
Note
- If you minimize the app, back out of it on your device, or turn off your phone’s display, the app will stop streaming after a few minutes. If you disconnect or lose connection while a game is running, you can resume playing by starting the stream again.
For now, explore Big Picture Mode with the D-pad and Button pad. The buttons on the screen may reposition and change depending on which section you are in.
When you are done, go into your Library, pick out a game, and launch it.
When the game starts, various touch controls will appear.
If there are no recommended configs available for the Remote Play Touch Controller, Steam will load a config from the most similar controller type. For games that have controller support, the config used is the Gamepad template; otherwise it will be the Keyboard (WASD) and Mouse template.
While you are in the game’s main menu, let us take a look at Steam Link Tray [. ].
Presented are the different mouse and touch controller modes that you control your game with. So actually, the Steam Link Touch Controller I have been referring to so far is composed of these two parts.
The large button on the right side allows you to switch between different Mouse modes, and below it is the gesture list for that mouse mode that includes the various gestures you can do and their corresponding actions. When you touch anywhere on the screen that is not a control, you can control the cursor, and it will move and behave based on your fingers’ movements and the mode you have chosen. There are four options: Trackpad, Trackpad Cursor, Direct Cursor, and Disabled.
Trackpad
Mouse input is the same as controlling a cursor with a laptop’s trackpad; moving your finger across the screen will move the cursor as well.

The gestures are as follows:
- Move: 1-finger slide
- Left Click: 1-finger tap
- Drag: 1-finger hold
- Right-click: 2-finger tap
- Zoom/Pan: 2-finger pinch/slide (when enabled)
- Keyboard: 3-finger tap
- Steam: 4-finger tap
Trackpad Cursor
Like Trackpad, mouse input is the same as moving it on a laptop’s trackpad. Although it may appear to behave the same as Trackpad, there are a few differences.
- Trackpad provides relative mouse motion to the game while Trackpad Cursor provides absolute mouse position to the game.
- The mouse cursor in Trackpad Cursor will stay in view while moving the cursor around when zoomed in (by zoom gesture); it does not in Trackpad.
- In some games, the cursor will be extremely sensitive when using Trackpad Cursor.
The gestures are the same as those for Trackpad.
Direct Cursor
Wherever you touch the screen, the cursor will move to that position. Similar to Trackpad Cursor, the cursor can exhibit extreme sensitivity in some games.
The gestures are as follows:
- Left Click: 1-finger tap
- Right-click: 2-finger tap
- Zoom/Pan: 2-finger pinch/slide (when enabled)
- Keyboard: 3-finger tap
- Steam: 4-finger tap
Disabled
Disables the mouse.
Note:
- Your fingers do not have to be close together when invoking gestures that require multiple fingers. For example, you can tap the opposite sides of the screen with your thumbs to invoke the right-click gesture.
These options will also change how your cursor behaves, and any changes to these are saved specifically to the config you are currently using.
Gesture: Zoom/Pan screen
Pressing this toggles the pinch-to-zoom gesture. By turning on this option, you can magnify the screen by performing a pinch-to-zoom gesture and then pan the screen afterwards with two fingers. The stream will snap back to place when you resize it back to its original size and center it. This gesture does not work if you have mouse mode disabled. 
Additionally, if you have zoomed or panned the screen and then toggle off the gesture, the screen is locked in place.
Trackpad Cursor Speed
This option changes the cursor speed of Trackpad and Trackpad Cursor. The default speed shows two cursor icons.
Hide Cursor at game launch
Pressing this will hide the cursor at the bottom-right corner of the screen. This is useful for when you are using gamepad controls to play a game but the game does not automatically hide the cursor.
Gesture: Right-click drag
The right-click drag is not listed in the Trackpad and Trackpad Cursor gesture lists, but it is available. As stated in the lists, to left-click drag you place a finger on the screen and hold it there.
Then drag your finger across the screen.
To perform right-click drag, begin by performing the left-click drag. Then use a different finger and tap the screen. The left-click drag now transitions into a right-click drag.
You can perform the gesture much quicker than in the above, to the point where the left-click drag is skipped directly to the right-click drag. 
For the right-click drag to work properly, the second finger that touches the screen should also be the one you lift off the screen or else the gesture will trigger right-click being held down but the cursor can not be moved. This can easily happen if you are performing the gesture quickly and not being careful about the order of finger contact and liftoff. 
Enabled
When enabled, you can place controls onto the screen through Layout Controls. These controls give you access to gamepad buttons, keyboard keys, and other Input Source Modes from Controller Configuration.
Disabled
Disables the controller, including the Guide button.
There are three main actions you can do to a control: position, scale, and remove.
Hold then drag a control off of Layout Controls, upon which the tray will close, and place it anywhere on the screen. The transparent blue color indicates that you are in Edit mode and touching empty space will not trigger the mouse if it is enabled.
Grouped Controls
Some controls move off as a group from Layout Controls. Once placed, the individual controls can be repositioned.
- Guide, Start, Back
- Button Pad
- Split Trackpad

Overlapping Controls
When controls overlap in Edit mode, their outlines become red. The app does not prevent you from overlapping them.
Reposition
Controls can be repositioned in two ways: move them in Edit Mode or drag the control again from Layout Controls.
Select multiple controls simultaneously
Multiple controls can be selected at a time in Edit mode by touching an empty spot and moving your finger diagonally over them, creating a box.
Deselect
Controls can be deselected by either selecting another control(s) or performing select multiple controls over empty space.
Controls can be made larger and smaller in Edit mode. Resize by touching the control and using another finger to pinch in or out. You can also place your fingers in unused space to resize after you touch and highlight it.
Controls can be removed from the screen. When you move controls in Edit mode, the Steam Link Tray [. ] icon turns into a trashcan. Release the control(s) over the trashcan to remove them. They can be placed again from Edit Layout.
To help organize your controls, there are three main ways: alignment guide lines, snap, and color and transparency.
Controls will snap to certain positions and/or sizes for various reasons:
Previous position and size
When a control is placed and saved in Layout Controls, the app will remember its position and size. The next time you move it, a grey ghost/outline of the control will remain at its original position. When moved close to it, the control will snap to that original position and size.
Snap to alignment guide lines
When a control is dragged through another, the other control will emit blue guidelines. Moving the control close to the blue guidelines will cause it to snap to the lines.
Controls of the same type
Controls of the same type will snap to each other if their axes are close enough or they are close to some set horizontal distance.

Predefined positions
The Steam Link tray menu, keyboard, and magnifying glass have predefined positions on the screen that they can snap to.
- Steam Link tray menu: all four corners.
- Keyboard: top-left and top-right corners.
- Magnifying Glass: top-right corner, below the keyboard’s predefined position.
Override control snap
To get around snapping in Edit mode, first let that control snap to where it wants. Then move it a small distance to where you want to place it. It will not snap unless you move it far away and back again.
These options will also change how your controller and layout behaves, and any changes to these settings will apply globally to any games you play.
Gyroscope
Toggling this will turn on/off the gyro. Note that in addition to this gyroscope option, the config in Controller Configuration also has a binding for gyro. If nothing is bound to it, such as Mouse used to control the mouse cursor, then attempting to use the gyro will have no effect, even when it is enabled in the app.
Rumble
Pressing this will turn on/off controller vibration.
Touch Controls Visibility
This option determines the visibility of the touch controls:
- Hide the controls after 10 seconds.
Always show the controls.
Copy/Paste and Reset Layout
In Layout Controls, access Copy, Paste, and Reset Layout via the ellipsis at the top-left corner.
- Press Copy Layout in one layout and Paste Layout in another layout that belongs to a different Action Layer or Action Set (discussed in Controller Configuration Basics) when you want to reuse the same layout. This is particularly helpful if you wish to keep consistent layouts of your controls.
- Press Reset Layout when you no longer want your current layout but want some controls in standard positions. The layout will be replaced by the same one you see in Big Picture Mode.
Magnifying Glass
After placing this control on the screen, pressing it will apply a magnifying glass effect on a rectangular region of the screen and pressing it again will turn it off. The magnified region can be moved by dragging it around with you finger. Additionally, a pinch-to-zoom gesture can be applied to it to zoom the image in and out (the pinch-to-zoom option for Mouse mode does not need to be enabled for this effect to take place). 
Note: The magnifying glass will follow the cursor, including when moving the cursor using any of the mouse modes.
Inspection Tool
Drag the inspection tool over the controls in Layout Controls to see their bindings or assigned names.
Statically and dynamically placed Joysticks
Unlike other controls, the joysticks can be placed in two ways: statically placed and dynamically placed.
Statically placed is the same you do to any control that you want to use. After enabling them through Controller Configuration, place them on the screen from Layout Controls.
Dynamically placed does not require you to place the joysticks onto the screen in order to use them, but Mouse mode must be disabled in the app. After enabling the joysticks through Controller Configuration, return to the game. The left and right joysticks will appear beneath your fingers anytime you touch the left half and right half of the screen, respectively. 
Difference between D-pad and Joystick
Besides how they appear on the screen, they behave a bit differently.
For D-pad, if you place your thumb on it, such as pressing Up, and then move your thumb away, the D-pad will stop receiving your command.
For joystick, if you place your thumb on it and press up, you can keep moving your thumb away from the area of the joystick and it will still receive your command.
Visual Feedback
The following includes topics on Controller Configuration that are described in more detail later in the Controller Configuration sections.
Toggle in an activator
When a control that has Toggle enabled in the activator is pressed, it will appear on the screen as being held down, or opaque. Pressing it again will turn off the control.
Long Press and Double Press activators
For controls with bindings that use the Long Press and/or Double Press activators, they will appear on the screen with additional indicators next to them.
A control that has a Long Press activator will have a line next to it.
- If this control also has a Regular Press activator, tapping it will cause the Regular Press activator to be triggered.
- When the control is held down, the line will fill up over time. After a certain amount of time, the duration of which is set through Controller Configuration, the bar will be filled and the Long Press activator will be triggered.
- If the control is released before the line is filled, the line will immediately reset to being empty.
A control that has a Double Press activator will have two dots next to it.
- When the control is pressed once, the first dot will become larger.
- If the control is pressed again within a certain amount of time, the duration of which is set through Controller Configuration, the second dot will also become larger and the Double Press activator will be triggered.
- If the control is not pressed again within a certain amount of time, the dots will reset to their original size. And if the control also has Regular Press activator, this will be triggered.

Note that for a control that has a Long Press and a Double Press activator, only the double dots indicator will be shown but holding down the button will cause a growing line to appear.
Now that you know how to create a layout for the touch controls, how do you change what the controls do? For example, how to make the [A] button on the Touch Controller act like the
All of the controls that you can place from Layout Controls in the Steam Link app correspond to Input Sources in Controller Configuration. So any changes you make there will modify how your controls behave in-game.
The behavior of each control that you see in Layout Controls in the Steam Link app can be modified through Controller Configuration in the Steam client.
From here, I will be guiding you on the basics of the Controller Configuration to get you started on creating a config for the Remote Play Touch Controller. Covering all aspects of it would be too overwhelming for this guide and much of it has already been explained well elsewhere.
Information on the SIC can be found in the Steamworks Documentation on Steam Input. Here are a few links from it to get you started:
- Steam Input — General Concepts
This will cover what the Steam Input Configurator is and explains how it works. - Steam Input — Input Sources
This expands a bit more on what Input Sources are (fairly straight-forward but necessary to understand for the next link). - Steam Input — Input Source Modes
A reference on the various behaviors of the Input Mode Sources, which change how certain Input Sources behave. While most of them are easy to understand, figuring out what some of their settings do can be a bit difficult. Use this link when there is something you do not understand.
There are a few ways to reach Controller Configuration; here are the two that you are likely to use with the Touch Controller:
- While in-game, press the Guide button -> Controller Configuration.
- While in Big Picture Mode, navigate to your game in the library -> Manage Game -> Controller Configuration.
That being said, you will likely use the first way since creating a config usually involves going back in forth between editing the layout in Edit mode in the app and changing the input sources in Controller Configuration until you are satisfied.
Note
- Steam must detect your controller before it will allow you access to Controller Configuration.
Enter the Steam Overlay and note what your layout is now. If you had modified the layout while you were in the game, it will be different from the layout you see in Steam Overlay. Now go to Layout Controls.
Notice again that the controls available here are different from the controls that you had in-game. That is because Steam can contextually change controls and layout depending on what screen you are in. Making adjustments now in Steam Overlay will modify the controls and layout associated with the Steam Overlay.
If you want to make any changes to the layout for a game, be sure you are actually in the game and not in Steam Overlay or Big Picture Mode. Otherwise, you will be modifying the controls for the wrong screen.
If developers have implemented the Steam Input API into their games, that means the control layout and bindings for their games can be context sensitive. This is called the Native mode in SIC. For example, a developer can make it so that the controls and layout automatically change when going from the Main Menu, where not that many controls are needed, to in-game play, where you will most likely need all the controls on your controller. However, most games you encounter will not have this implemented. This means you will be using Legacy mode where controls are not context sensitive. While this can be inconvenient, using action sets and action layers in Controller Configuration can make this less of a problem.
For the following sections, I will be constantly referring to the different parts of the Touch Controller, the bindings in Controller Configuration, and the corresponding action in game.
For the sake of clarity, I will be using the following notation in the Controller Configuration sections to distinguish which of the three I am talking about.
- [Touch Controller control]
- When enclosed in brackets, this refers to some part of the Touch Controller.
- When enclosed in parentheses, this refers to a binding in Controller Configuration.
- Action
- When capitalized and italicized, this an action in the game.
Some examples:
- [A] is set to
- When Touch Controller’s [A] gamepad button in Steam Link is pressed, the is triggered in-game. In the case of platformer games, the character would Jump.
- [Right Joystick] has an Outer Binding set to
- [Start] is set to
- Pressing the Touch Controller’s [Start] button in Steam Link will correspondingly press
in-game. This will bring up the Pause Menu or Back out of a menu option in most games.
- Pressing the Touch Controller’s [Start] button in Steam Link will correspondingly press
- [M1] is set to <`>(this symbol is tilde)
- When pressing the Touch Controller’s [M1] button in Steam Link, <`>will be triggered in the game. For games developed by Valve such as Half-Life and Portal 2, this will bring up the Developer Console, assuming it has been enabled in the game’s settings.
When you enter Controller Configuration, you will be presented with the following:
- Start
- Back
- Shoulder buttons
- Trigger Buttons
- Digital pad
- Button pad
- Trackpad (Center/Unified)
- Trackpad (Left-Right/Split)
- Joysticks
- Joysticks button
- Macro buttons (M1-M8)
- Always on
- Gyro
- Touchscreen mouse gestures: modifies 1-finger and 2-finger mouse gestures.
- Action Sets
- Action Layers
1 to 14 are Input Sources.
If you feel this layout looks familiar, it is similar to the one for the PlayStation DualShock 4 controller, with the addition of Macro buttons and Touchscreen mouse gestures.
Any control that you change in Controller Configuration is reflected in the app, whether that is modifying, adding, or deleting buttons. If you deactivate anything here, the corresponding control will be removed from your layout in-game and become unselectable in Layout Controls.
Switch (Start, Back, Shoulder buttons, Macro buttons, Always On, Touchscreen mouse gestures) are simple digital buttons. While Trigger buttons can have analog values, they behave like simple digital buttons in the Touch Controller.
The Input Source Modes are listed under Style of Input within each Input Source in Controller Configuration, and I will refer to Input Source Modes and Style of Input synonymously.
Explore and change the various options to see how the controls behave within the game. You can set the Touch Controller to use gamepad input, keyboard input, or a mixture of both. Remember that there is a link above that can explain what the various options do in case you are unsure.
Note:
- The Center and Left/Right Trackpads are available for editing, but only Center or Left/Right can be placed in the app, not both.
- Anything assigned to Always On in an action set will stay active until the user changes to another action set.
- The shape of controls in-game do not change regardless of which input source modes you choose to assign to them in Controller Configuration. For example, the D-pad set to use Radial Menu will still appear as a D-pad in the app but it will behave as a Radial Menu.
- There are games that do not react well to mixing gamepad input and keyboard input. In particular, the in-game button prompts may immediately switch between gamepad and keyboard/mouse, depending on the detected input, or the games may entirely disable one of the inputs. You will have to test this out if you plan to mix them together.
You can access advanced settings for a binding by pressing the Activators button at the bottom.
This reveals the different activation types which change how the button behaves:
- Regular Press — This is the default choice whenever you make a binding.
- Double Press — Press a button twice within the Double Tap Time to trigger this binding.
- Long Press — Hold a button for the duration of Long Press Time to trigger this binding.
- Start Press — This binding triggers the moment you press the button.
- Release Press — This binding triggers after you release the button.
You can have multiple Activators assigned to a button.
Fire Start Delay and Fire End Delay affect when a button is triggered and for how long it will be held down. When a button with multiple activators is pressed, the timers for these settings begin simultaneously.
An action set is a group of bindings with an associated layout in Controller Configuration. When you begin editing a new config, that is what you are editing. You can add more sets and switch between them while playing. Because each set has its own layout, you will have to make a different layout for each one in the app.
One way action sets become useful is if a game has multiple states and the controls in one state share little in common with the controls in another state. For example, controlling a character on foot and driving a vehicle in an open world game can have very different controls. Therefore, you can create one action set for running around and another for driving, and switch between the two as needed. Another example is when the game has access to special menus such as the developer console, it can be useful to place them into a separate action set.

An action layer is similar to an action set, except it exists within an action set and only contains whatever input sources that you have added or changed to its parent action set. Another difference is that multiple layers can be active at once. Each layer that you apply in a set during gameplay is stacked at the top of all layers so that whatever buttons the top layer contains will override the corresponding buttons in the layers below them, similar to layers in a photo/image editing software. A good explanation and example of action layers can be found at Steamworks Documentation — Action Set Layers. Any layer added during gameplay can also be removed.
When you add or modify any input source in an action layer, you can also adjust those controls’ positions in the layout. For the buttons that you do not change, any attempts to move their positions in the layer’s layout will not be saved by the app; they will remain at their original positions associated with the action set.
Because action sets and action layers also contain layouts in Steam Link, they can also be used to simply move controls about your screen. For example, in 2D side scrolling beat ’em ups, enemies usually come from the lower right side of the screen. If your button pad is located there, then the buttons and your fingers pressing them can block your vision from seeing enemies coming. You can create an action set or layer to move the buttons around as needed while playing.
Here I will be going through the parts of Controller Configuration that I frequently use.
For [Start], [Back], [Shoulder buttons], [Macro buttons], [Always On], [Touchscreen mouse gestures], they are simple digital buttons. After selecting one of them, you can choose which gamepad input, keyboard key, or mouse button you would like to assign.
For example, modify the [M1] button to be the button in Controller Configuration. Now return to the game and go to Layout Controls. The [M1] button that was previously grayed out will now be available for you to position. Place it on the screen and leave Layout Controls. Press the new [M1] button and note that it now acts as an button.

For the [Triggers], you can also do the same, but note that there are two places that you assign them: Full Pull Action and Soft Pull Action. While having the two options is useful for physical gamepads, for the case of the Touch Controller, the [Triggers] appear as buttons on the screen so the only thing you can do is press them. In that case, you can assign bindings to either Soft Pull Action or Full Pull Action. If you are binding keyboard keys, I recommend setting Trigger Analog Output to Off, or else the corresponding button in game may not react properly.
For each binding, you can also assign an icon which will appear in the app.
When you enter either [Joysticks], a Style of Input will appear on the left. Selecting it will present the various Input Source Modes in a drop-down menu. Your choice here will change how the joystick behaves.
Note that in order to use [Joystick buttons] in game, one of the Style of Inputs must be selected. In each one, there is an entry called Click Action, and setting a binding here will make available [Joystick buttons] in the app.
- If you assign a button in one Style of Input but decide to use another, the binding in Click Action from the first is not transferred to the second, so it must be set again.
- There are other places in Controller Configuration that have Click Action entries, but those do not have a corresponding button in the Touch Controller. Only the Click Action entries in the [Joysticks] have buttons in the app.
Here are the Input Source Modes I commonly use.
- Directional Pad
- Joystick Move
- Radial Menu
Directional Pad
This allows you to set bindings for the cardinal directions of the [Joysticks]. This is useful for games where you plan on using keyboard bindings. For example
- When using Directional Pad for the [Left Joystick], I can set the cardinal directions to be
for moving a character in a first/third-person game. - The same bindings, or the keyboard’s arrow keys, are also commonly used for controlling the top-down camera in isometric games.
Joystick Move
First, note that the Output can be set to
- By default, the Touch Controller’s [Left Joystick] is set to output gamepad’s
and the Touch Controller’s [Right Joystick] is set to output gamepad’s . This is what you would use when you want to use the [Joysticks] as the gamepad’s , assuming the game has controller support. is useful when you want to control the mouse cursor in-game while using a joystick behavior. So the further you push the [Joystick] the faster the cursor will move.
Radial Menu
Some games have many keyboard shortcuts, most of which can be useful. However, placing all of them on the screen might not be practical because they may end up obstructing your view of the game. In that case, you can place buttons in the Radial Menu, particularly into each Menu Button. When placed on the screen, placing your finger on the [Right Joystick] will show the items in the menu. To use less space on the screen, you can resize [Right Joystick] to be even smaller.

For Menu Activation Style, it should be set to either Touch Release/Modeshift End or Always. By default, the [Joysticks] use the former.
- Touch Release/Modeshift End — When you move your finger over a menu item and then lift your finger, the menu item is triggered.
- Always — When you move your finger over a menu item, the corresponding action is immediately held down and stays so until you lift your finger.
- Button Click and Button Release — These work only on physical gamepads, so do not use these for the Touch Controller.
The first menu option is always located as the top option in the Radial Menu in the game. The positioning of the rest of the menu items depends on how many have been bound. Some examples:
- 2 Menu Buttons — Top and bottom positions.
- 4 Menu Buttons — Cardinal positions. The order for Button 1, 2, 3, and 4, are located at the top, right, left, and bottom positions.
- 8 Menu Buttons — Cardinal and diagional positions. The order for Button 1, 2, 3, 4, etc. are located at the top, top-right, right, bottom-right positions, etc.
When Center/Unselected Button is bound, it will appear at the center of the Radial Menu.
To change the location of where the Radial Menu appears on the screen, adjust the following two settings:
- On-Screen Horizontal Position — With a range of 0 to 1, 0 corresponds to the top edge of your screen and 1 to the bottom.
- On-Screen Vertical Position — With a range of 0 to 1, 0 corresponds to the left edge of your screen and 1 to the right.
Notes:
- Display Binding Label on the Button can be toggled.
- Note that the Radial Menu that appears in Steam Link will also appear on your host computer.
Just like for [Joysticks], when you enter the [Digital Pad], which I’ll also refer to as [D-Pad], there’s a Style of Input on the left. For this setting, I primarily use Directional Pad.
This works the same way as it does for the [Joysticks].
The setting I’ll emphasize this time is Layout.
- 8 Way (Overlap)
- This is useful when you need two of the cardinal directions to activate simultaneously. For example, if you bound
to [D-Pad Up] and to [D-Pad Left], you’re able to press [D-Pad Up] and [D-Pad Left] at the same time to move diagonally left in a first/third-person game.
- This is useful when you need two of the cardinal directions to activate simultaneously. For example, if you bound
- 4 Way (No Overlap)
- This is useful when you do not need any of the cardinal directions to activate simultaneously. For example, if the game you’re playing has four keyboard shortcuts for accessing four different menus, then you don’t need any of them to activate at the same time.
Under the Style of Input, I primarily use Button Pad.
This one is self-explanatory. Once selected, you can assign bindings as usual.
There are three trackpads available: [Split Trackpads], which I’ll also call [Left Trackpad] and [Right Trackpad], and the [Unified Trackpad], which I’ll call [Center Trackpad]. You can only place either the [Split Trackpads] or the [Centered Trackpad] in Steam Link. The app doesn’t allow you to place both.
In practice, the [Trackpads] are very similar to [Joysticks], the difference being some of the Input Source Modes they can access.
Here are the Style of Inputs I commonly use.
- Mouse
- Joystick Move
- Touch Menu
- Radial Menu
Mouse
I use this mainly for the Activator’s Attach Trackpad/Analog Stick. By attaching a Trackpad to a button, I can press that button, triggering whatever binding it has, and control the cursor at the same time. This is explained in more detail in Controller Configuration — Touch Controller Specific.
I use Joystick Move in [Trackpad] for the same reason as I use Mouse. I can attach [Joysticks] that uses Joystick Move to a button, so that when I press a button I can control the
Touch Menu
Similar to Radial Menu, this allows you to place multiple items into a menu. The main difference between the two is the arrangement of the buttons.

Note that Touch Menu does not work for [Center Trackpad].
This works the same way as it does for Radial Menu for the [Joysticks].

Note that Touch Menu does not work for [Center Trackpad].
There are a couple of settings in Controller Configuration that are unique to the Steam Link Touch Controller.
For each of the mouse modes, the default gestures for 1-finger and 2-finger gestures can be overridden by changing the [1-finger] and [2-finger] bindings. And just like other bindings, this has access to Activators as well.
This can be useful when you want to change how a game is played on a touchscreen device or to resolve clicking issues.
- For the former case, some platform shooters require the player to aim the weapon first by holding
before a weapon can be shot via . This feels fine when using a mouse, but it can feel unnatural on a touchscreen device to have to aim a weapon first before firing. Instead, rebind [1-finger] to via Multi-Button. This way the player can shoot immediately upon touching the screen. - There are some games where tapping the screen is not registered as a left-click gesture. Instead, the player has to press the screen for a bit longer before the game detects the left-click. As to why this occurs, I am unsure, but one way to resolve this is to set [1-finger] gesture to
and then go into Activators to set Fire Delay End to a longer duration, such as 0.1 seconds (4 ticks).
For each binding, you can attach any of the [Trackpads] and [Joysticks]. This option is found under Activators as Activate Analog Stick/Trackpad. When you press the button with the [Joystick] or [Trackpad], the binding will be triggered and whatever Input Source Mode is being used for the [Joystick] or [Trackpad] will be invoked. The circle, square, or rectangle that appears around the button is an indicator that a [Joystick], [Left/Right Trackpad], or [Center Trackpad] is being invoked, respectively.

In this case, I had set Activate Analog Stick/Trackpad to [Center Trackpad]. Notice when I press [A] to Jump, the [Center Trackpad] with Mouse appears, represented as a rectangle, allowing me to control the camera while holding the button.
Note that the [Trackpads] and [Joysticks] can be set to use any Style of Input (as an exception, Radial Menu and Touch Menu do not work with [Center Trackpad]). For a couple more examples,
For a strategy game where you are planning on using keyboard bindings to access menu shortcuts
- Set [Macro 1] to be
. - Go into Activators and set Activate Trackpad/Analog Sticks to [Right Joystick].
- Go back to the top level and then into the [Right Joystick]
- Set Style of Input to Radial Menu.
- Set Menu Activation Style to Touch Release/Modeshift End (or Always depending on what you like).
- Fill in the Menu Items with the keyboard shortcuts you like.
Now when you press [Macro 1], the button itself will not trigger any gamepad or keyboard binding and a Radial Menu will appear, allowing you to move your thumb to select the desired item. Note that to use a Radial/Touch Menu, it is unnecessary to do the above steps, since you can simply place the [Trackpad] or [Joystick] in the layout. The benefit of this method is that a button uses less space on the screen compared to a [Trackpad] or [Joystick]; the smallest size of either one of those is still larger than the default size of a button.

In this case, the game required multi-button presses to cast magic spells, so I decided to set the [Right Trackpad]’s Style of Input to Radial Menu and place the spells in it for easy access. The square control that I accessed on the right is the [Right Trackpad] set to its smallest size. The button on the left that I pressed is a regular button at its default size, and it activates the [Right Trackpad], represented as a square, allowing me to access the Radial Menu and cast spells.
For a first/third person game where you are planning on using gamepad bindings for
- Go to [Left Joystick] and set it to Joystick Move.
- By default, Output should be
and Click Action should be , which in this game is used for Sprint. - Go into Activators for [Left Stick Click] and set Activate Trackpad/Analog Sticks to [Left Joystick].
Now you can Sprint and control the [Left Joystick] at the same time, allowing you to sprint and control the character’s direction with a single finger.

In this case, the game did not have controller support. Instead, for the [Left Joystick], I chose Directional Pad under the Style of Input and bound the directions to
Activate Analog Stick/Trackpad option is available for three activation types:
- Regular Press
- Long Press
- Double Press
To achieve the effect of Release Press activation type while controlling a [Joystick] or [Trackpad], you can do the following.
- Bind
to the [control] you want to use. - Go into activators and set to activate a [Joystick] or [Trackpad].
- Add a Release Press activator and set it the
you want.
This allows you to press and hold the [control], control the [Joystick] or [Trackpad], and then trigger the
When you are satisfied with your configs, you will want to save your work. While Steam will periodically auto-save your configs as Personal Bindings, you can also manually save them.
At the bottom of Controller Configuration, go to Export Configs.
Personal
A config can be saved under this category as two types: personal binding and local-only binding file.
Personal Binding
Bindings saved here will be attached to your Steam account. That means that even if you use different phones/tablets and computers, the bindings can be loaded from here.
Local-only
Bindings will be saved as a .vdf files on your computer, which can be opened with any text editor. In the case of Windows, they will be found at
The game’s App ID can be found by going to the game’s store page on Steam and it will be in the URL link.
For example, the store page for Slime Rancher is https://store.steampowered.com/app/433340/Slime_Rancher/, so the App ID is 433340.
Community
If you want to share your config with other Steam users, you can save your config to Community. To upload a config here, you need to play with your config for at least 5 minutes without making any adjustments to the bindings in Controller Configuration and without making any adjustments in Layout Controls or Touch Controller/Mouse modes within the Steam Link app. Exporting a config here will also create a personal binding under the Personal section.
Template
If you have a combination of layout and bindings that you are planning on reusing across many games, this is the place you can save your config.
This is where you can browse configs that you and other people have created.
At the bottom of Controller Configuration, go to Browse Configs.
You can import and apply configs that you find here. By default, the Controller Configuration will only show configs that are compatible or nearly compatible with the controller you are using. If you press «Show Other Controller Types,» then you can see configs for many other controllers, such as the Steam Controller, Xbox One Controller, and DualShock 4 Controller.
Recommended
This is where configs created by developers are located. If the bottom-right corner of the entry includes text that does not state Remote Play Touch Controller, then the config listed was not originally made to be used with the Steam Link’s Touch Controller.
Personal
This is where all of your saved configs are located.
Community
Configs that have been shared with the community are found here. Because the Steam Link Touch Controller is young and less well-known, this section will be empty for most games.
Templates
This is where Valve provided templates and all of your saved configs that you intend to reuse are located.
Your Other Games
All personal bindings that you have saved for every game can be found here. In a way the purpose of this category is similar to Templates, with the main difference being that this category will populate over time as you create more bindings and import bindings from the community.
In both Browse Configs and Export Configs, configs that you have created can be deleted by highlighting their entries and pressing Remove. This applies to both personal bindings and community configs that you have uploaded.
Note
- When you export a config to the community, a corresponding personal binding will be created after some time. Deleting this personal binding will also remove your community config. So if you do not want to remove your community config, be careful of which personal binding you delete.
- If you remove a config and it does not disappear, it should be gone after you restart your Steam client.
- If you wish to delete a config you exported to the community, but the Delete option is not available (this may happen if you export the config and then immediately try to delete afterwards), try restarting the Steam client. The option should appear.
In addition to what has already been mentioned, here is an additional list of tips that should prove useful when creating a config for the Touch Controller. To understand these tips, I’ll be assuming that you are very familiar with the Steam Link app and Controller Configuration and that the config being developed will be shared to the community. Lastly, I design layouts based on the idea that I will be playing on a phone with only my thumbs, so no claw grip.
So here are my tips:
- Before committing to a layout, you should have a rough idea of where to and where not to place controls at, because important game elements can appear on any part of the screen. So the things you will have to be wary of are static and dynamic UI elements as well as gameplay events.
- Remember that you can look at the keyboard/gamepad bindings for reference, or look up a manual for older games.
- Although controls can be placed anywhere on the screen, often they are placed along the sides. When looking at physical controllers, most buttons on its face are easily reachable by thumbs without too much stretching (the noticeable exceptions being the Start and Back buttons). It is the same for the Touch Controller. On the other hand, if you feel it is more natural to place the buttons elsewhere, please do so. Unfortunately, this can mean that a lot of controls may be crammed along the sides.
- Most of the time, I end up choosing Joystick over D-pad for movement, mostly because the Joystick will continue receiving commands if my thumb leaves the circle while the D-pad requires my thumb to be constantly in contact in order to receive commands. (I also find pressing up-right consistently a bit difficult but that might just be me).
- Remember that the D-pad can be used for other things besides movement. I often use it to store additional buttons.
- Spend some time thinking about whether to use Trackpad or Direct Cursor. Some games provide more information by highlighting in-game objects with the cursor, which Trackpad is suitable for. Additionally, you can control the cursor with both thumbs and comfortably move the cursor to all parts of the screen. On the other hand, Direct Cursor may require stretching of thumbs or fingers, and information that would have been displayed when highlighting UI elements may be missing when selecting them, but the interaction with the game can feel more natural. Basically, this is a balance between information, comfort, and natural interaction.
- Unlike physical controllers, there is almost no standard controls placement for the Touch Controller. The only consistent layout is the one that is created after performing Reset Layout in Layout Controls, which is the same as the layout for Big Picture Mode. This layout will always be the same on any particular device. Keep this in mind when building a layout if you are concerned with a standard experience, but do not let it prevent you from making modifications.
- It feels natural to place the Guide, Start, and Back buttons at the top-middle of the screen, but that is often where there is important information in-game, such as a compass. So plenty of times I move them off to the sides.
- Because of the different aspect ratios of phones, the controls’ positions will become «stretched» when making layouts on a phone of one aspect ratio and playing on a phone of another. This is similar to playing a 4:3 video as stretched on a 16:9 screen. Consequences of this appears as follows:
- The button pad where the buttons are positioned as a diamond on a 16:9 screen will be slightly wider on a wider screen (a recent trend in phone screens). Rather then adjusting the individual placements on the button pad, I would recommend leaving them alone. Once again, this goes back to a standard layout from Reset Layout as the consistent thing between devices of different aspect ratios.
- It will be difficult to avoid, many times impossible, placing controls over in-game UI elements. Because of devices’ different aspect ratios, the stream feed will be the same (assuming that the player keeps playing on a 16:9 resolution) but the controls that may have previously been placed to avoid UI elements may now be covering them on different phones and tablets.
- I still consider 16:9 screens the standard, so while 18:9 screens grant extra real estate in the form of black bars on the sides, placing buttons there on an 18:9 screen may end up covering UI elements when a player loads up the config on a 16:9 screen.
- When it is inevitable that controls will overlap important game elements, such as a mini-map, and text for quests, consider adjusting how opaque (or transparent) the controls are to improve readability. This is available in Layout Controls in the Steam Link Tray menu via the colored wheel.
- Action Sets and Action Layers in Controller Configuration can be used to simply move controls around. Controls being on the screen means your fingers will be covering up parts of the screen while playing. Important events and obstacles can be accidentally hidden under your fingers. Having a button that changes action sets/layers to move controls around can help alleviate this issue. Examples are side-scrolling beat ’em ups and multiplayer games.
- Remember that you can scale button sizes. For example, if I use a D-pad to store four additional buttons that are not used frequently, then I will make the D-pad smaller.
- If you need to toggle a button, there are two ways: Activators or Always On combined with Action Sets/Layers. The way for activators is self-explanatory when you look at the settings. For Always On, it will keep holding down that button until you switch to another Action Set/Layer. So you can switch between action sets/layers as a way to toggle off and on buttons. A problem can occur when you have another button that has the same command as the toggle. For example, in a 3D game where left-click hold grabs objects and release to let go of objects, if you toggle grab and then press left-click, the object will be released but the toggle will not cancel. To get toggle to work again, it must be turned off and on again. In this case, this can be resolved by binding One-Finger control in Controller Configuration to Empty, making tapping the screen do nothing, or you can bind the control to remove the action set/layer upon tapping which then removes the toggle.
- If you need to chain commands together, there are two ways: Toggle Multi-Button On and Activators. For Toggle Multi-Button On, just input the buttons in the order that you want (if you input the sequence incorrectly, you will have to remove that button and start over). However, Multi-Button may be too fast for the game. In that case, there’s Activator. For the Activator, set your initial button; then add an Activator, set your button, and set the «Fire Start Delay» up 1 tick (0.025). For the second Activator, set the button and then set «Fire Start Delay» up 2 ticks. Repeat this trend for each additional activator and adjust the delay as needed.
- With the above point, you can combine chained commands with Radial and Touch Menu. This is seen in clip in the introduction for Castle Crashers. Right Trigger is for beginning a magic spell and additional button are pressed to cast them. I used Multi-Button to store the button combos into a Radial menu. Now I do not have to fuss about holding down the Right Trigger button with a thumb while pressing the other buttons with my other thumb; it can all be done with one thumb.
- Even if you do not like like using gyro, consider testing it out and enabling it in Controller Configuration. The user can always disable it through the Steam Link tray menu.
I hope this guide has proven somewhat enlightening. It ended up much longer than I expected and there are still topics that I would like to cover, in particular the Tips section. I’ll see if I can do that later, either in this guide or in a separate one.
Also, a couple of months after creating this guide, I started doing contract work for Valve. That said, this guide is not within the scope of my work for Valve and is something I update for fun.
Источник